How to Deploy a JBoss Cluster with Ansible Pt. 1
Ansible helps you automate your infrastructure configuration so you can focus on building better software.


Personally, I like to ride trains that don’t crash into other ones.
And our recent client, a transportation department who I'll call "Govgov", works to make sure that doesn't happen.
But when we arrived, they were spending a week setting up infrastructure for new environments. Which leaves less time to improve their product.
Or, less time to make sure you and I don’t wind up splattered on the tracks.
From One Week to One Hour
Ansible is an automation platform that helps us configure infrastructure in a fraction of the time. The platform contains three main things:
- Inventory - The hosts to target
- Playbooks - The desired state for a host
- Engine - A way to run playbooks
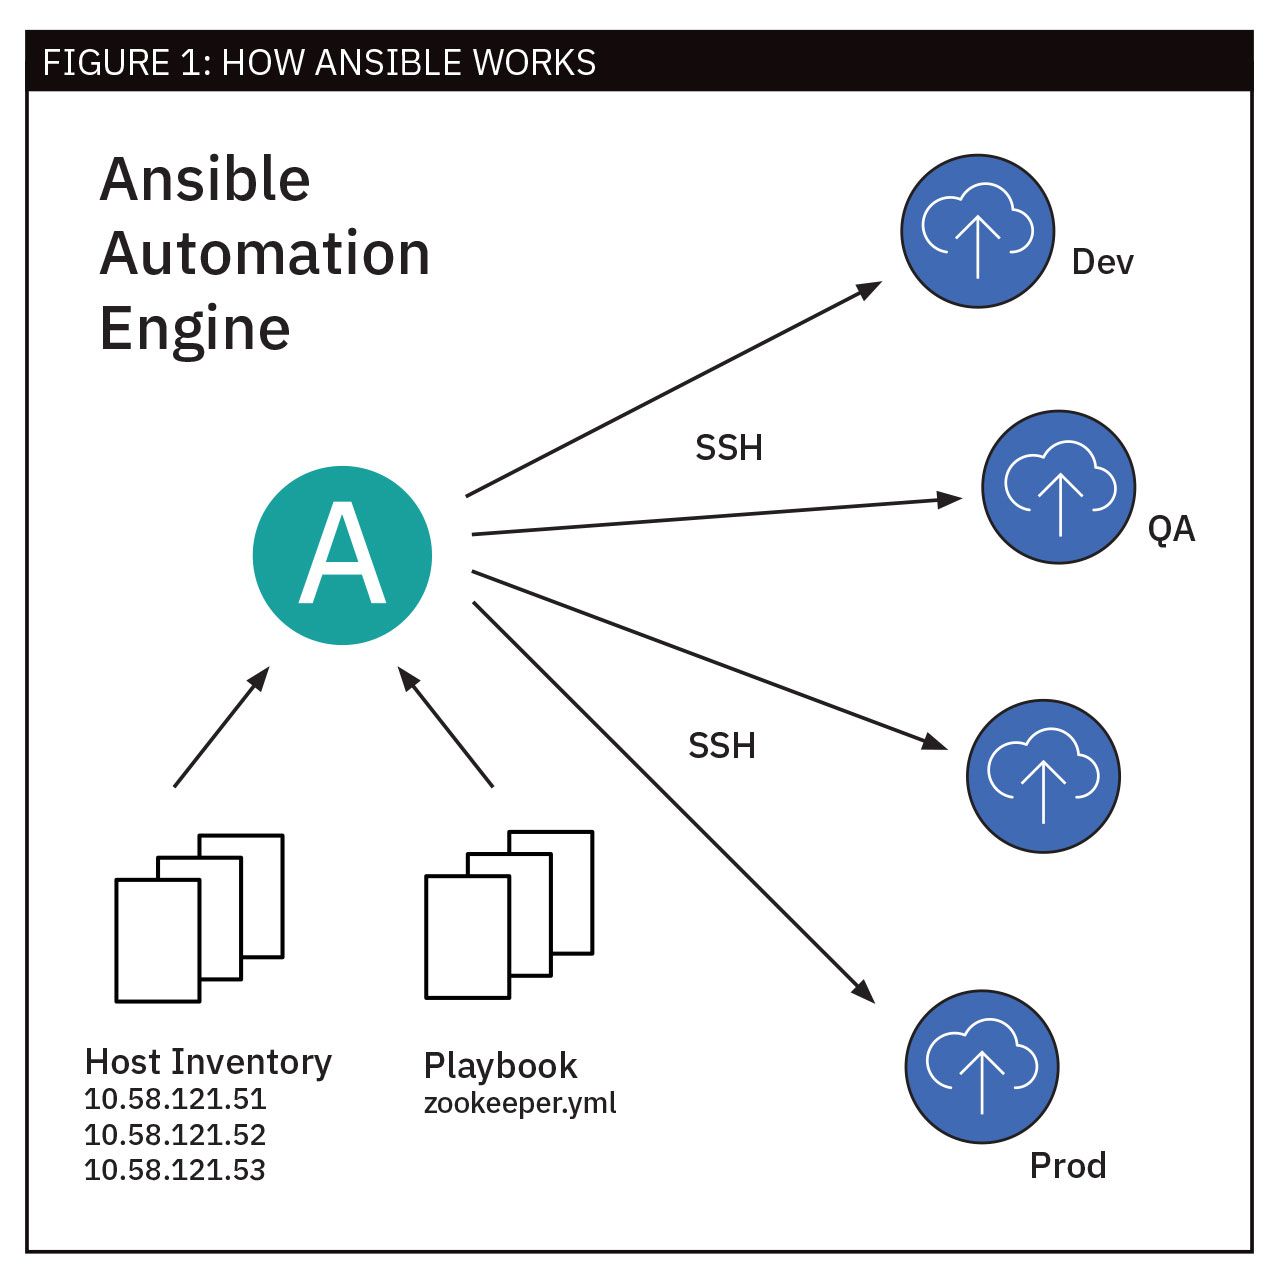
We use Ansible to automate the configuration, deployment, and orchestration of our environments. And after we created playbooks for Govgov, they were able to set up a new environment in an hour.
Creating an Ansible Playbook
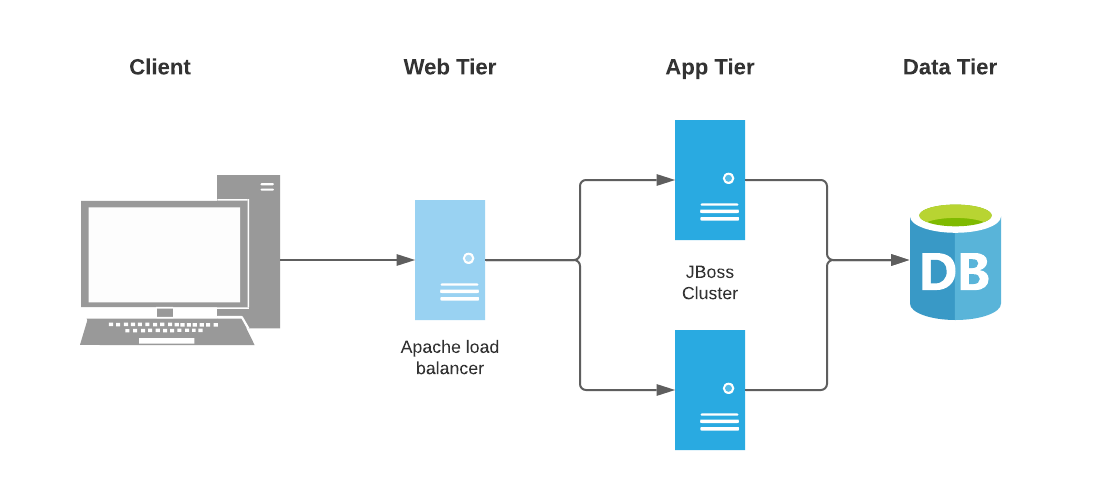
Govgov runs various transportation applications on a three tier architecture. For part one, we’ll create an Ansible playbook to set up the web tier: an apache mod cluster load balancer. In part two, we'll set up the JBoss nodes.
What You’ll Need
- Ansible Installation
- Docker Installation & Docker Hub Account
- Basic Linux Knowledge
Step 1: Define Our Target Hosts
First, download and extract the starter project. This has a playbook, host file, and a load balancer configuration that we’ll use later.
Open the host file. You should see something like this:
[webservers]An inventory (or host) file is where we define the systems we want to configure. You’ll see a group called webservers. Groups are a way to taget multiple systems at once. Ansible also allows you to target individual hosts.
Next, add a host to our group. On the line below, add:
apache ansible_connection=dockerOur first target host is called apache. We'll use a docker container because it's far quicker than you spinning up giant VMs. In a regular setup, you’d provide the IP or fully qualified hostname and ansible will work over SSH. Like this:
apache ansible_host=10.28.31.161If you’re unfamiliar with containers, they’re a package of software and all its dependencies. It’s a really fast way to bring up & tear down environments.
Step 2: Create a Playbook
Open the playbook called site.yml. You should see this:
---
- name: Configure Apache Web Server
  hosts: webservers
  vars: apache_user:
    apache apache_group:
    apache
  tasks:
    - name: Check if HTTPD Service Exists
      stat: path=/etc/httpd
      register: service_status
A playbook is a list of steps to configure an entire environment. Each step, or "play", contains a series of tasks that configure a host for a purpose. Playbooks are written in yaml format with two space indents.
The first play is called Configure Apache Web Server. Here are a few things to note:
- Hosts - sets the target host group to “webservers”
- Vars - sets up variables that we’ll use later
- Tasks - a list of tasks with one task
First, take a look at our one task:
- name: Check if HTTPD Service Exists
  stat: path=/etc/httpd
  register: service_status
A task is a single unit of action (Ex. start httpd). They have custom names and use modules to perform actions. Here, the stat module checks if /etc/httpd exists.
Then, we use the register keyword to put that status (a boolean) into a variable called service_status. The full list of ansible modules is here.
Add a second task to stop httpd if it exists:
# Be sure to line up the indents with the task above!
# And, add a newline between each task

- name: Ensure HTTPD service is stopped
  when: service_status.stat.exists
  service:
    name: httpd
    state: stopped
Here we use the when keyword to determine if httpd exists. If it does, the service module will stop httpd.
We’ll now create a group and user for apache. Add two tasks:
- name: Create Apache Group
  group:
    name: "{{ apache_group }}"
    system: yes
    state: present
    gid: "48"

- name: Create Apache User
  user:
    name: "{{ apache_user }}"
    comment: "Apache User"
    uid: "48"
    group: "{{ apache_group }}"
    state: present
These tasks ensure that a user and group is present. We're also using the variables we set up at the top to specify the user and group names. To reference a variable, we use double brackets:
{{ my var }}Next, add a task to install httpd and a few tools:
- name: Install HTTPD & Helpful Tools
  dnf:
    name: httpd, unzip, wget
    state: present
This task uses dnf ("next-gen" yum) to ensure httpd and some other packages are installed.
Now we’ll configure our load balancer, mod_cluster. Add these three tasks:
- name: Unarchive mod cluster
  unarchive:
    src: https://github.com/modcluster/mod_cluster/releases/download/1.3.1.Final/mod_cluster-1.3.1.Final-linux2-x64-so.tar.gz
    dest: /etc/httpd/modules
    remote_src: yes

- name: Copy Mod Cluster Config
  copy:
    src: "mod_cluster.conf"
    dest: "/etc/httpd/conf.d/"

- name: Remove Proxy Balancer Module
  lineinfile:
    state: present
    path: "/etc/httpd/conf.modules.d/00-proxy.conf"
    regexp: "LoadModule proxy_balancer_module modules/mod_proxy_balancer.so"
    line: "#LoadModule proxy_balancer_module modules/mod_proxy_balancer.so"
Let's break down what's going on in these tasks.
- The first task uses unarchive to download mod_cluster and extract them
- The second task copies a file from the ansible host (your machine) to the target
- The third task uses lineinfile to update a config file on the host
- This line needs to be removed for mod_cluster to work
Ok. We’re ready to enable httpd and start it. Add our last two tasks:
- name: Enable HTTPD
  service:
    name: httpd
    enabled: yes

- name: Start HTTPD
  service:
    name: httpd
    state: started
Save your playbook. If all went well, our playbook should configure a base CentOS system as a load balancer.
Step 3: Run the Playbook
We’ll run our playbook on a docker container. In a terminal, start the RHEL 8 container:
docker run -dit \
--tmpfs /tmp --tmpfs /run \
-v /sys/fs/cgroup:/sys/fs/cgroup:ro \
-p 80:80 -p 8001:6666 -p 23364:23364/udp \
--name=apache registry.access.redhat.com/ubi8/ubi-init
This is mostly docker lingo. But for those interested, these parameters do a few things:
--tmpfs:Mount container path in host memory-p:Expose containers ports for mod_cluster (6666, 23364) and httpd (80)-v:Attach a volume that's required for systemd--name:Give our container a name
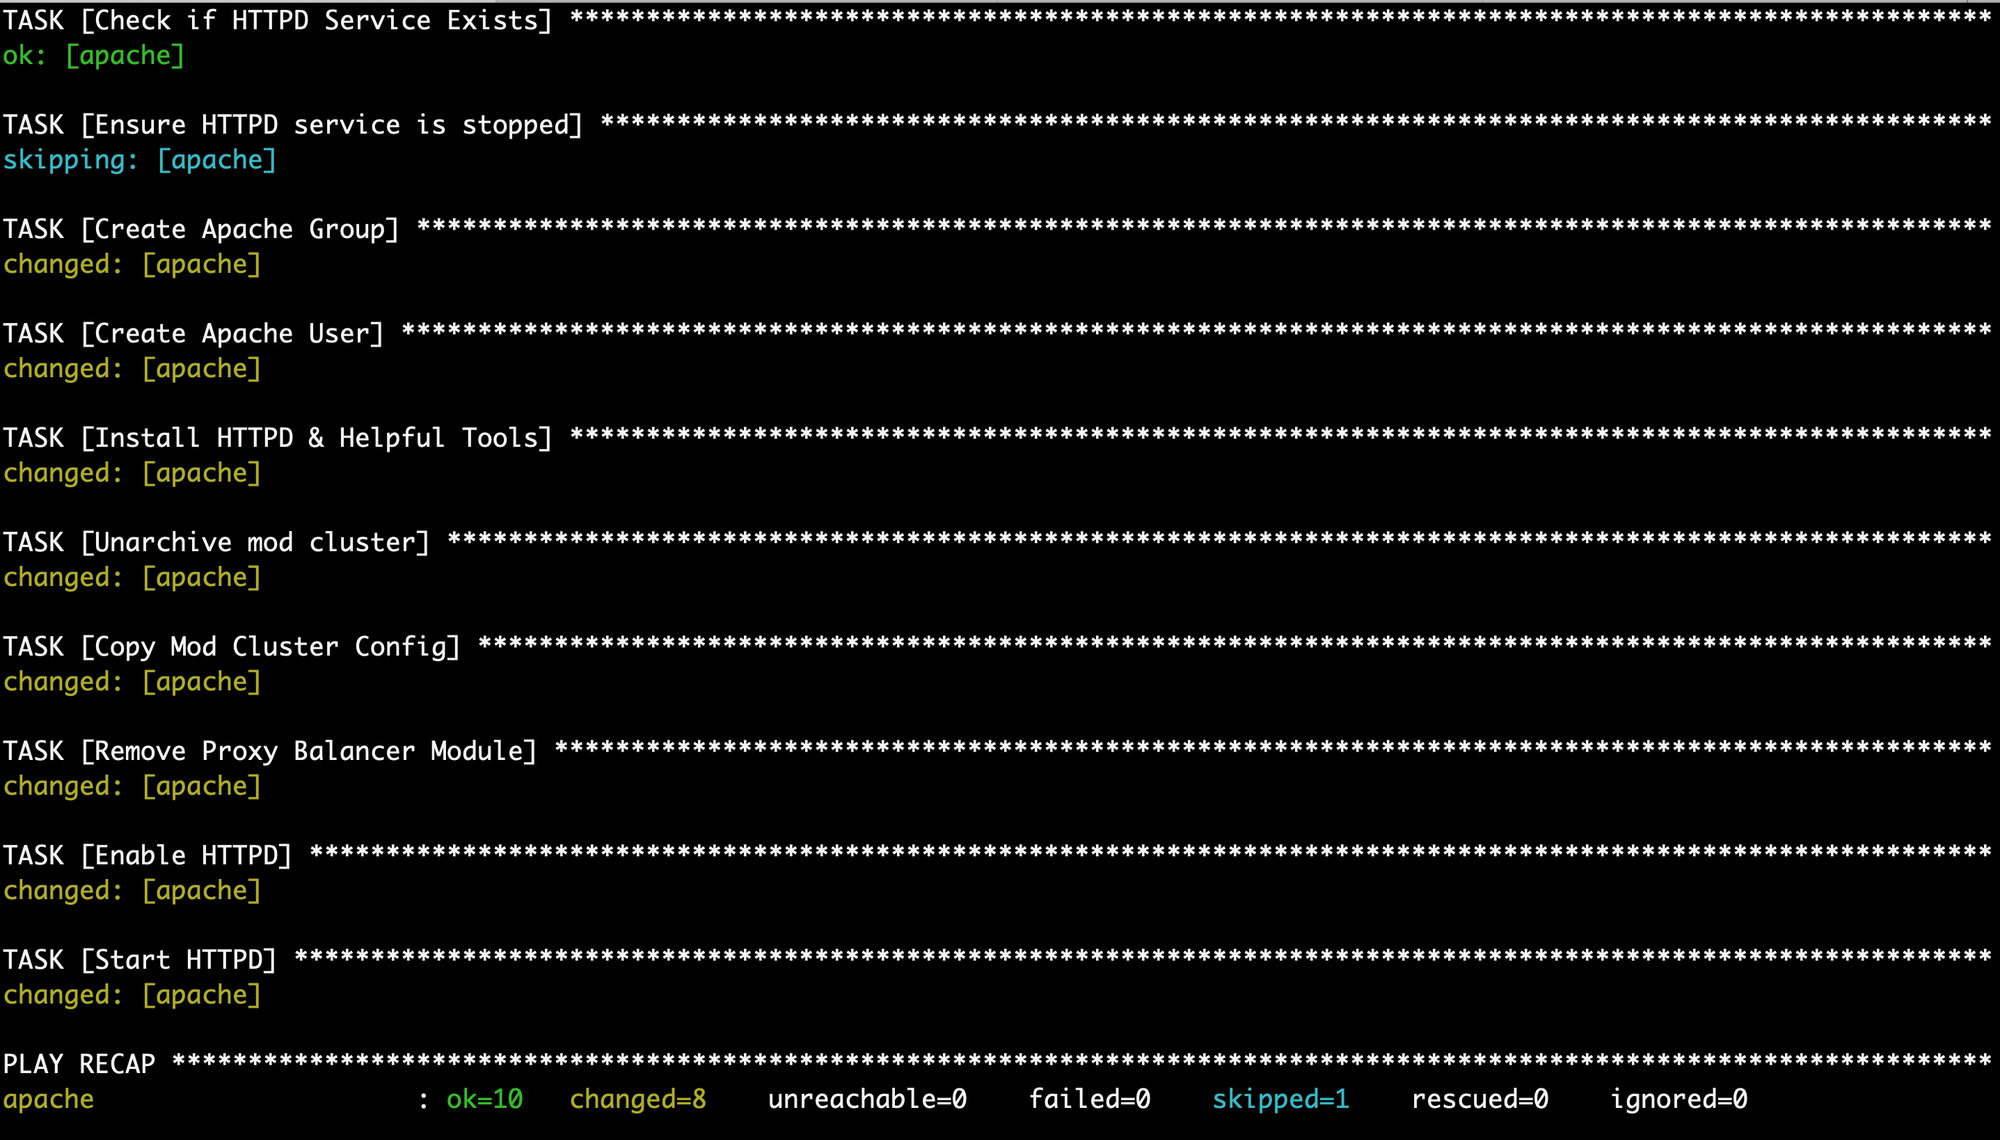
Open the ansible-starter directory in a terminal. And then, run our playbook:
ansible-playbook -i hosts site.ymlHere we provide the path to our inventory file (-i) and our playbook to run. You should see something like this:
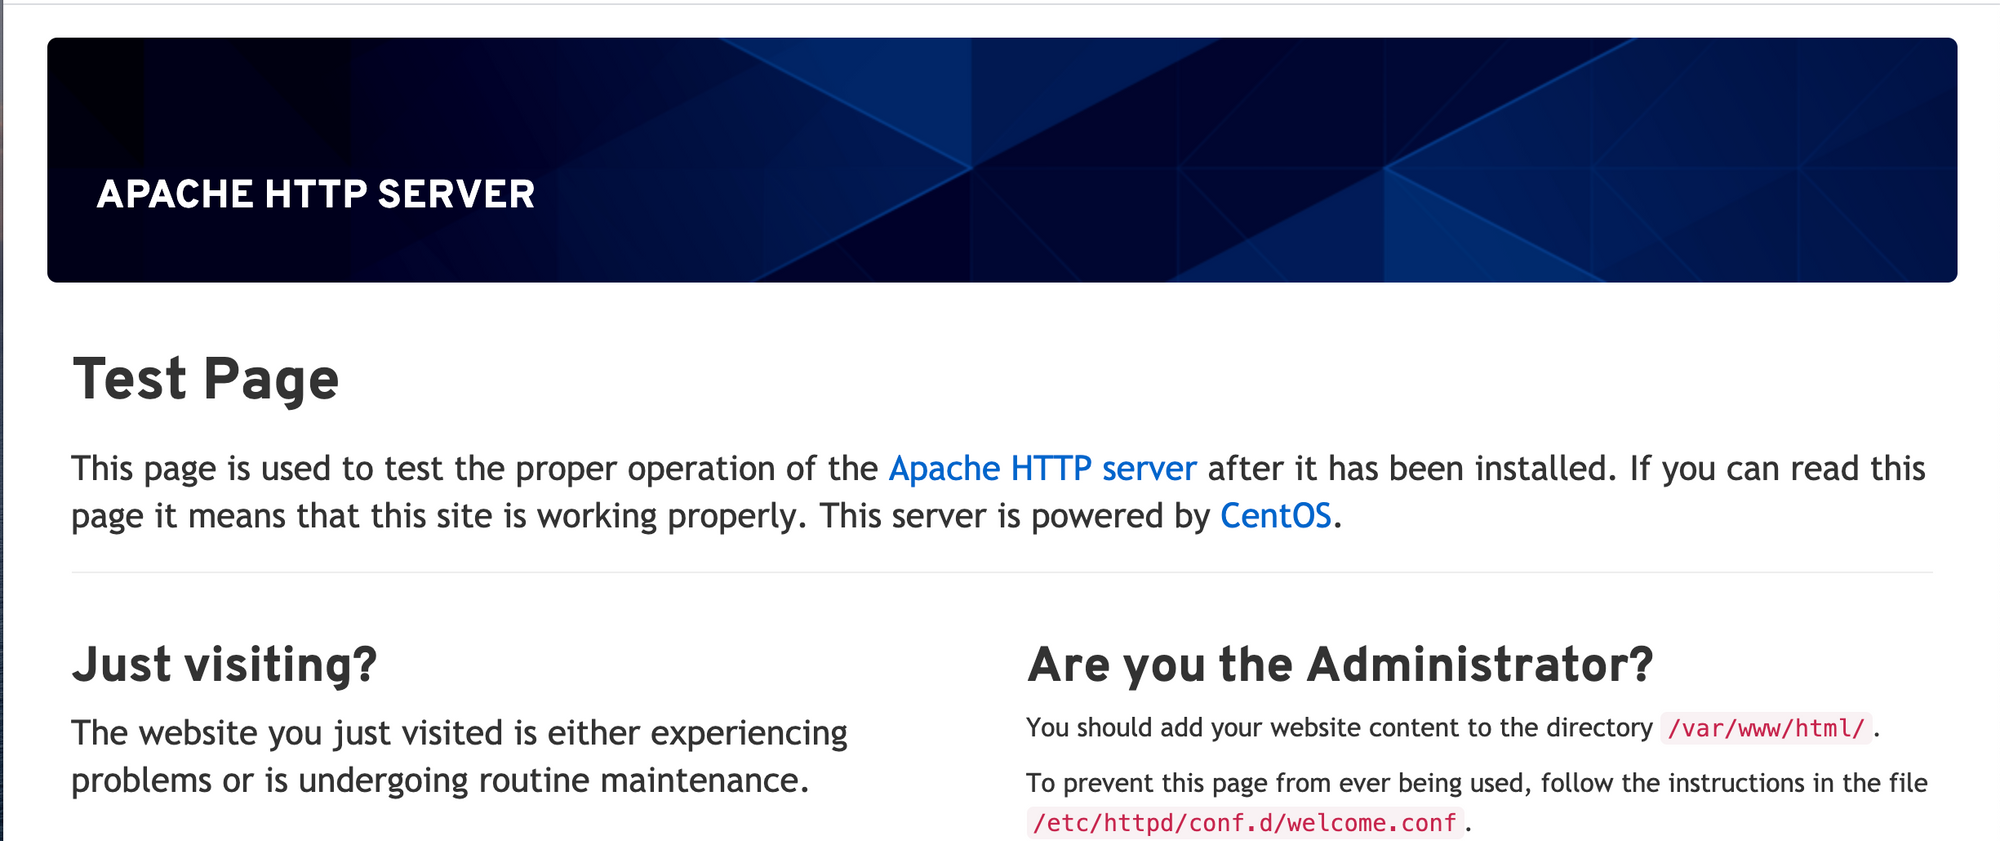
Nice Work! Let’s test that our load balancer is running. Go to http://localhost and verify that you see this:
Go to http://localhost:8001/mod_cluster_manager and verify that you see this:

To clean up, stop the container:
docker rm -f apacheBest Practices
Before you create a playbook for your organization, make sure you document and test the manual steps first. That way, you can reference a known working process.
Recap
Ansible helps us automate our infrastructure setup. We defined our target hosts in an inventory file, specified our steps in a playbook, and ran ansible-playbook to configure a load balancer in minutes -- not hours.
In part two, we'll deploy our JBoss cluster and organize our playbooks with Ansible roles.
Project Code & Links
Happy Coding!
-T.O.