How to Setup a Jenkins Pipeline on OpenShift
OpenShift integrates with Jenkins to help you create CI/CD pipelines fast using technologies you already know.


At the end of last year, I received emails from customers all asking about the same thing: Jenkins pipelines on OpenShift.
Everyone is moving to containers. And while Kubernetes is great for managing containers, it does nothing to help us build them.
But OpenShift is much more more than Kubernetes. It’s an entire platform that helps us go from code to container. CI/CD pipelines are built right in.
Familiar Pipelines on OpenShift
If you’re considering writing new pipelines, you should really consider OpenShift Pipelines – a cloud native approach to CI/CD. However, many customers want to get the value of OpenShift but also want to use a familiar CI/CD tool like Jenkins.
How to Setup Jenkins Pipelines on OpenShift
We’ll set up a Jenkins Pipeline in OpenShift. When we’re done, you’ll be able to push to a git repository and have a Jenkins pipeline build a container image and deploy it to OpenShift.
What You’ll Need
- Basic Git knowledge
- Basic Jenkins experience
- GitHub account
Step 1: Create OpenShift and Jenkins Environment
First, we’ll set up your OpenShift environment. The easiest way to do that is to create a developer sandbox. You can get one of those here.
Once your sandbox is set up, we’re ready to spin up Jenkins. OpenShift comes with a built-in image for that. For our purposes, we’re going to create an ephemeral Jenkins server.
Under the developer tab, click the "Add" button and select “All Services”.
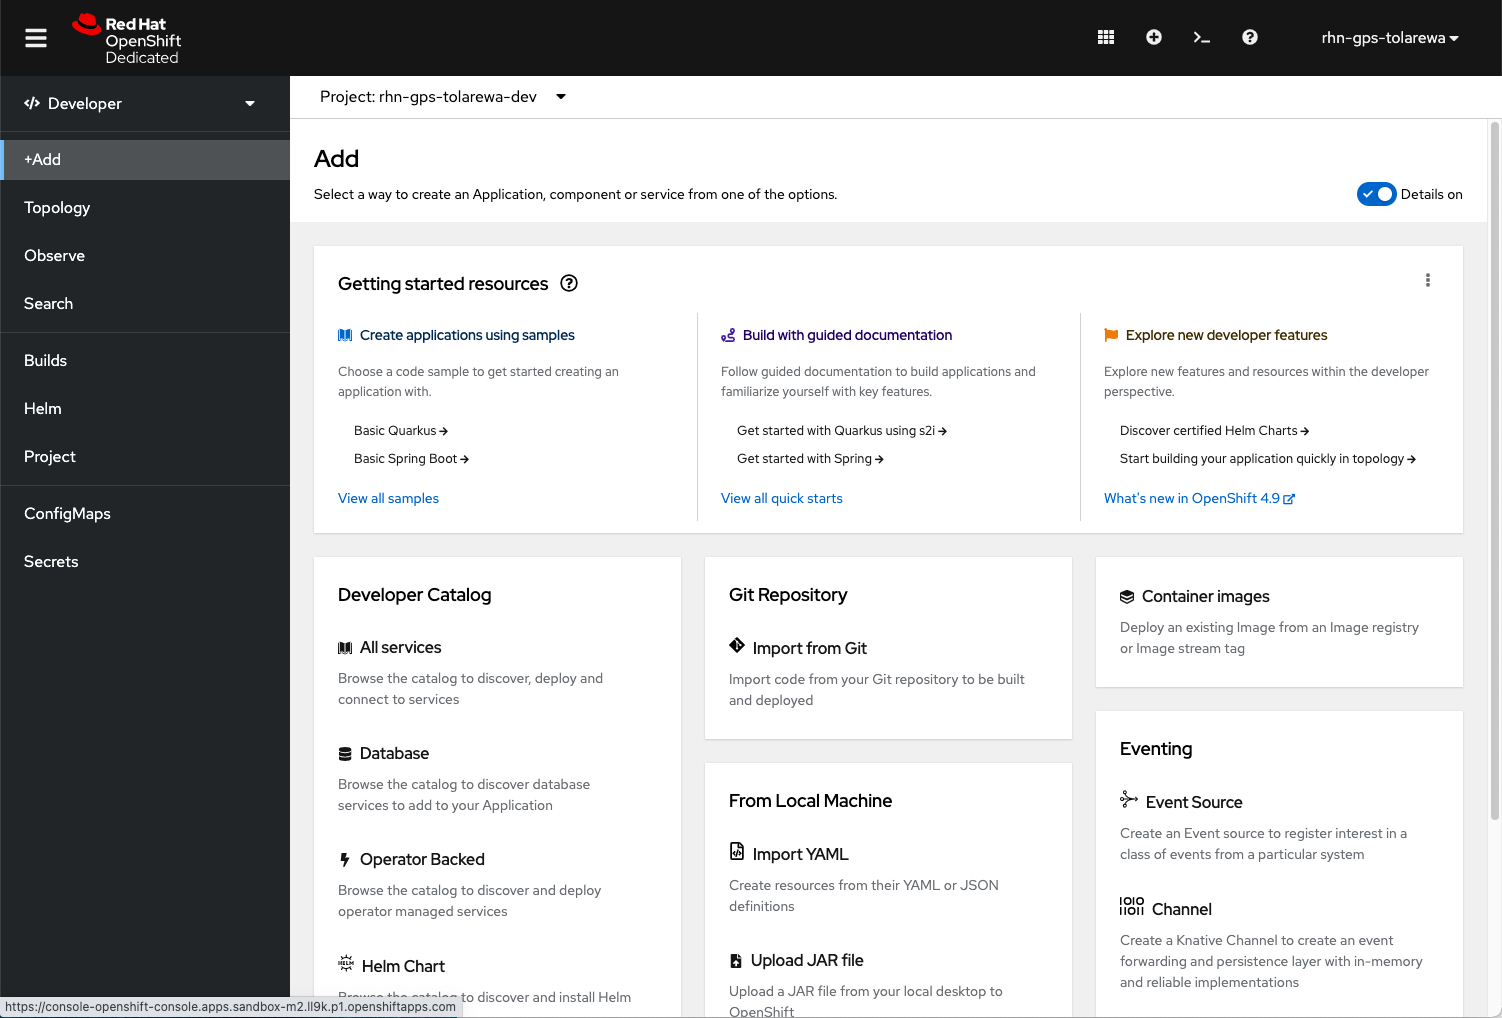
In the search tab, type "jenkins ephemeral". Click “Instantiate Template” and select Create.
This will create a Jenkins container and a url for us to access it.
Click the "Topology" tab to view the progress of the Jenkins server. Select the Jenkins deployment. When it has finished deploying, you will see one pod in the “running” state.
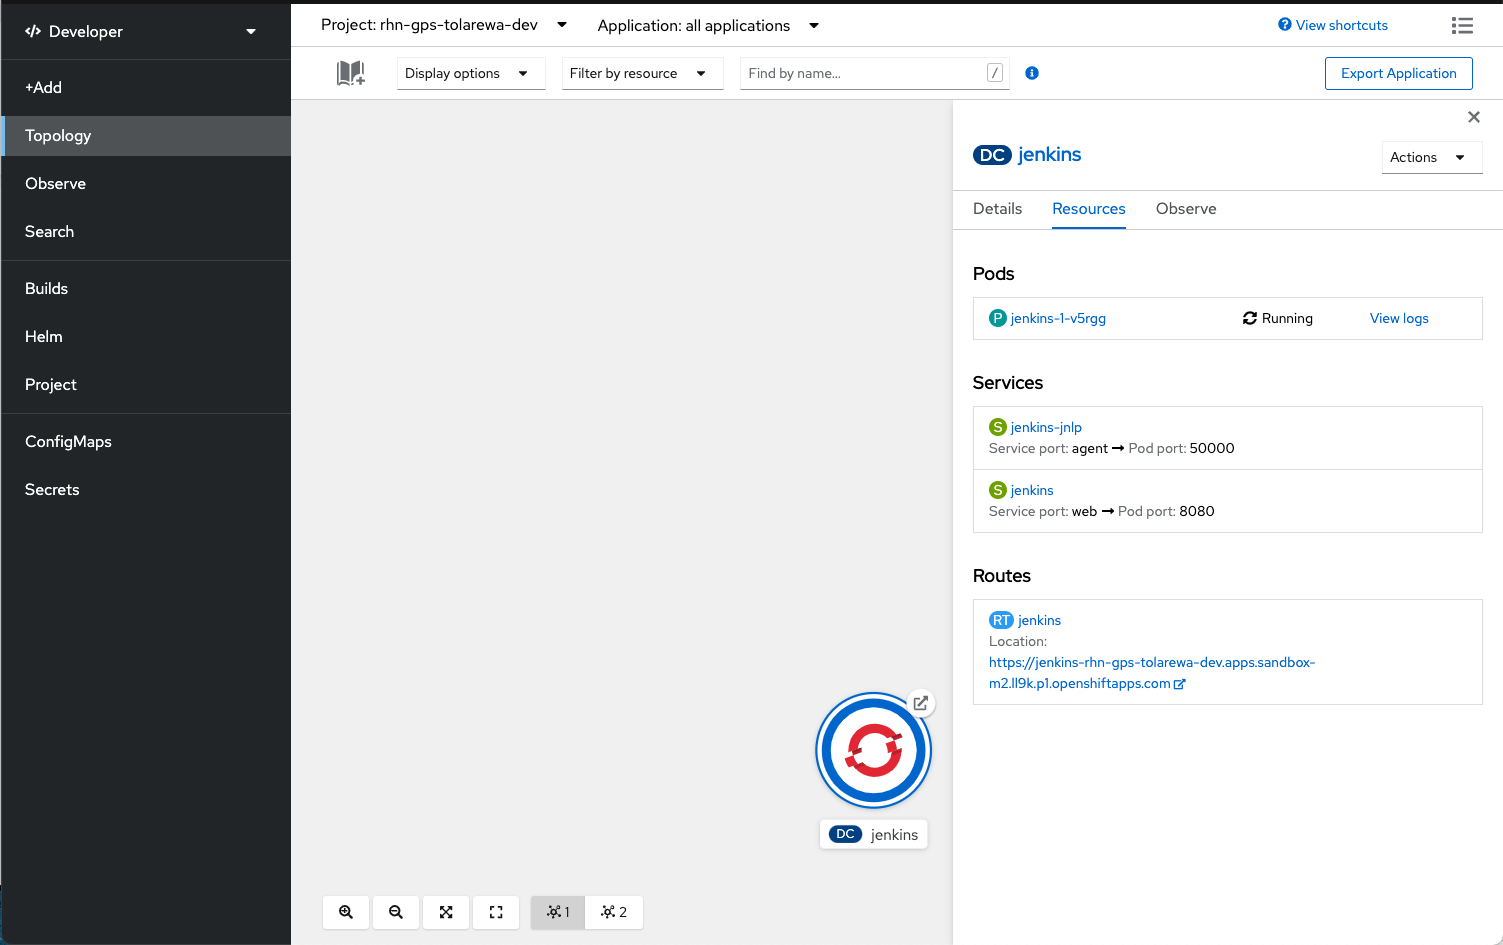
Next, we’ll verify that Jenkins deployed correctly. On that same application page, scroll down to the bottom and click the route url.
If you see the Jenkins login page, you've successfully created a Jenkins server!
Step 2: Create Jenkins Pipeline
We’ll create a Jenkins pipeline that builds a container from our source code. For this tutorial, we’ll use a sample java project. It’s a simple hello-world project that runs on Java EE.
First, fork the example source repo here. Then, clone the repo to your local computer and switch to the pipelines branch.
git clone <your_url>
git checkout openshift-jenkins-pipeline
cd codelikethewind
Open the Jenkins file. This is a scaffold pipeline that we’ll modify to build, create a container image, and deploy to OpenShift.
Add the following to the steps block under the build stage.
sh 'mvn clean package'This step will compile our source code, package it into a jar, and place it in the target folder on our build server.
Next, we need to take that artifact and build a container image. The easiest way to do that is by using OpenShift Source-to-image. This process takes our source code and combines it with a builder image to create a runnable container.
S2I is built into OpenShift. But to access it, we need to use the OpenShift Jenkins Client plugin. Fortunately, this plugin is already included on Jenkins container images in OpenShift.
First, go back to the OpenShift console and get your project name.

Then, in the “Create Container Image” stage of the Jenkinsfile, add the following between the script tags. Be sure to replace the project name with yours.
openshift.withCluster() {
  openshift.withProject("<your_project_name>") {

    def buildConfigExists = openshift.selector("bc", "codelikethewind").exists()

    if(!buildConfigExists){
      openshift.newBuild("--name=codelikethewind", "--docker-image=registry.redhat.io/jboss-eap-7/eap74-openjdk8-openshift-rhel7", "--binary")
    }

    openshift.selector("bc", "codelikethewind").startBuild("--from-file=target/simple-servlet-0.0.1-SNAPSHOT.war", "--follow") } }
Using the OpenShift plugin, this code does a few things:
- Check if a build config exists. We don’t want to create one for each pipeline run
- Create a build config. BuildConfigs describe how container images get built on OpenShift
- Start a new build. Source to Image can use source code or a binary. Here it’ll take our WAR and the builder image to build a runnable container
Finally, we need to deploy our container to OpenShift. Under the steps block in the “Deploy” stage, add the following between the script tags. Be sure to replace the project name with yours.
openshift.withCluster() {
  openshift.withProject("<your_project_name") {
    def deployment = openshift.selector("dc", "codelikethewind")

    if(!deployment.exists()){
      openshift.newApp('codelikethewind', "--as-deployment-config").narrow('svc').expose()
    }

    timeout(5) {
      openshift.selector("dc", "codelikethewind").related('pods').untilEach(1) {
        return (it.object().status.phase == "Running")
      }
    }
  }
}
Like with our build config, we’ll check for an existing deployment. If there’s not, we’ll create a new application. oc new-app creates all the resources you need to deploy your container. When it’s done, you’ll have a url to access the application.
The last line helps us monitor the status of this deployment. We only want to mark this stage as done when our containers are running.
Save you changes and push them to your repository.
git add . && git commit -m “Update jenkins pipeline” && git pushStep 3: Create Build Configuration
Now that we have our Jenkins pipeline, we need to tell OpenShift to use it for our builds. We’ll use a BuildConfig for this as well.
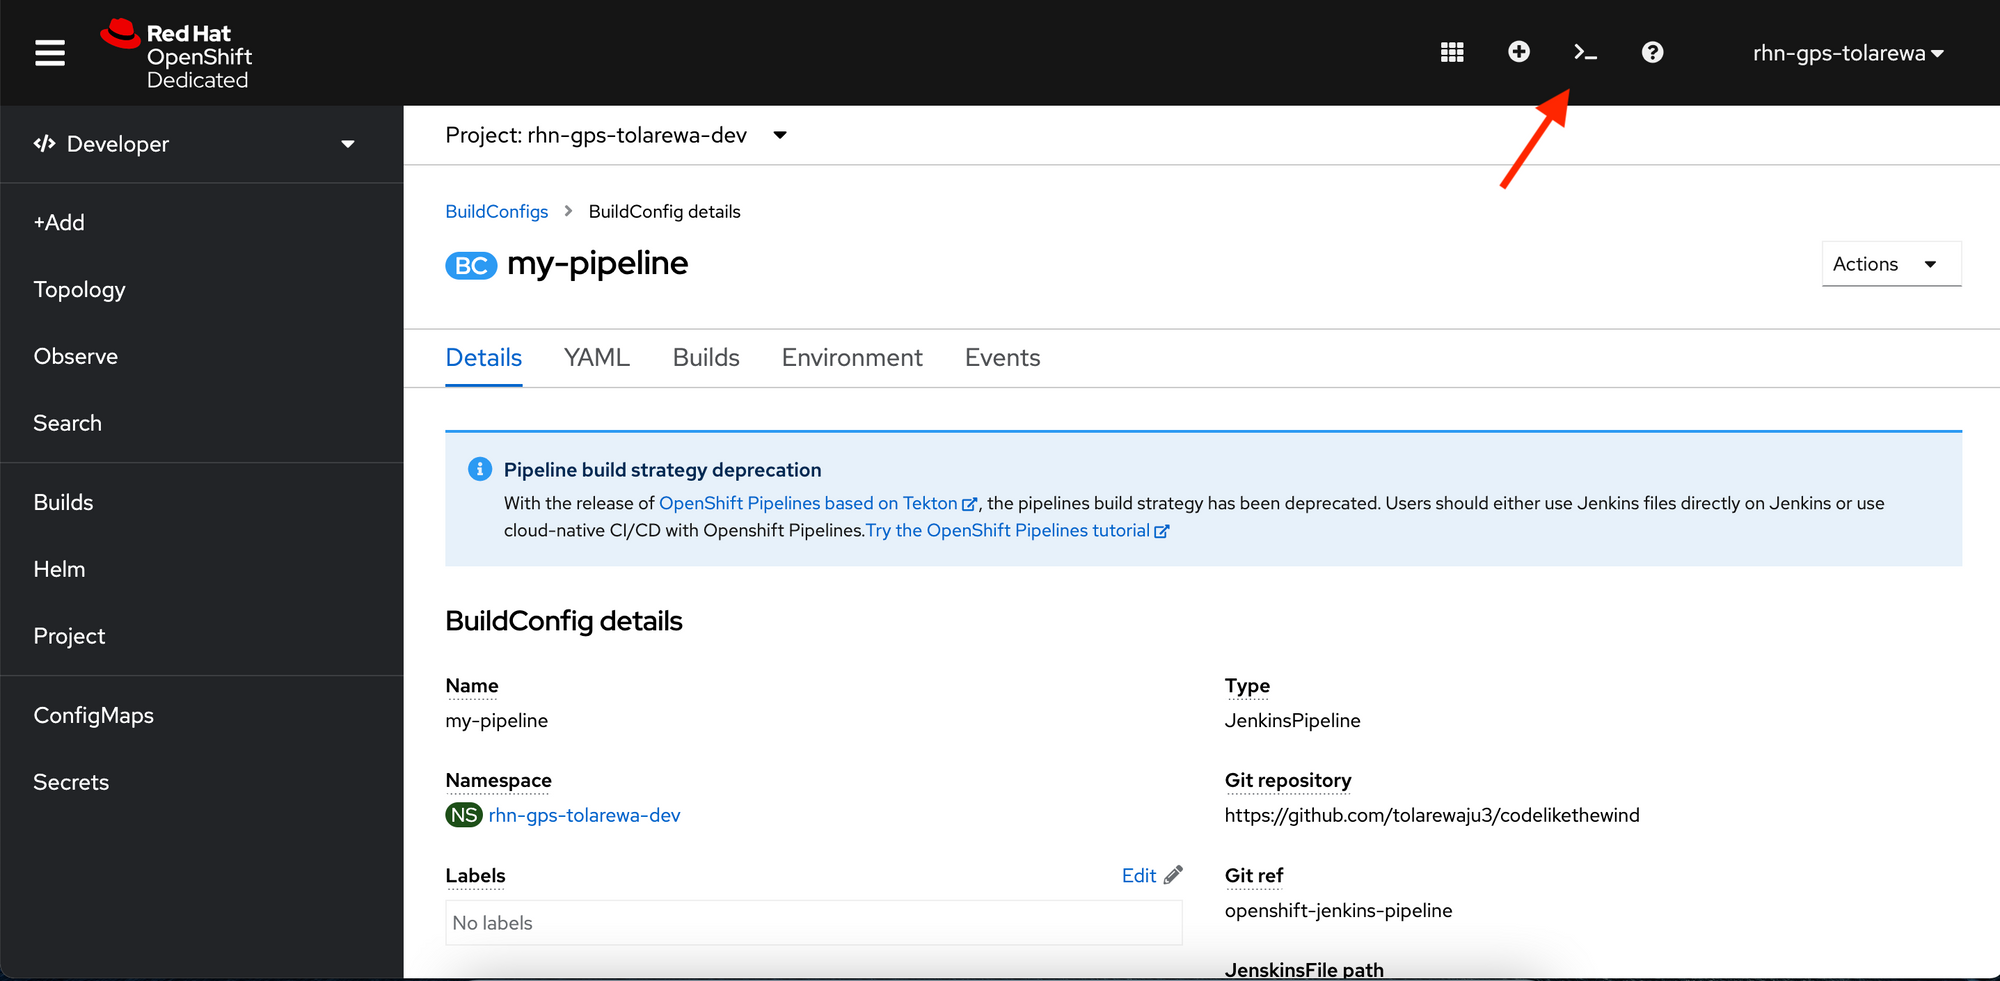
Select "Builds" in the console and then click on "Create BuildConfig".

Change the name of your build config to `my-pipeline`. Next, update the git uri and ref to match your git repository. This is where it’ll look for your Jenkins pipeline file.
uri: <your_repo_url>
ref: openshift-jenkins-pipeline
Replace the build strategy section so it looks like this:
strategy:
    jenkinsPipelineStrategy:
      jenkinsfilePath: Jenkinsfile
This tells our build config that we’ll be using a Jenkins pipeline to build and deploy our container image. Click “Create” to create a new build config.
Finally, we’ll add a webhook to the build config. Open the OpenShift command window.
When it loads, enter the following:
oc set triggers bc/my-pipeline --from-githubClose the terminal and go back to the build config. When you refresh, you should see a webhook at the bottom. Click “Copy URL with secret”.
Go to your GitHub account, open the repository and click Settings.
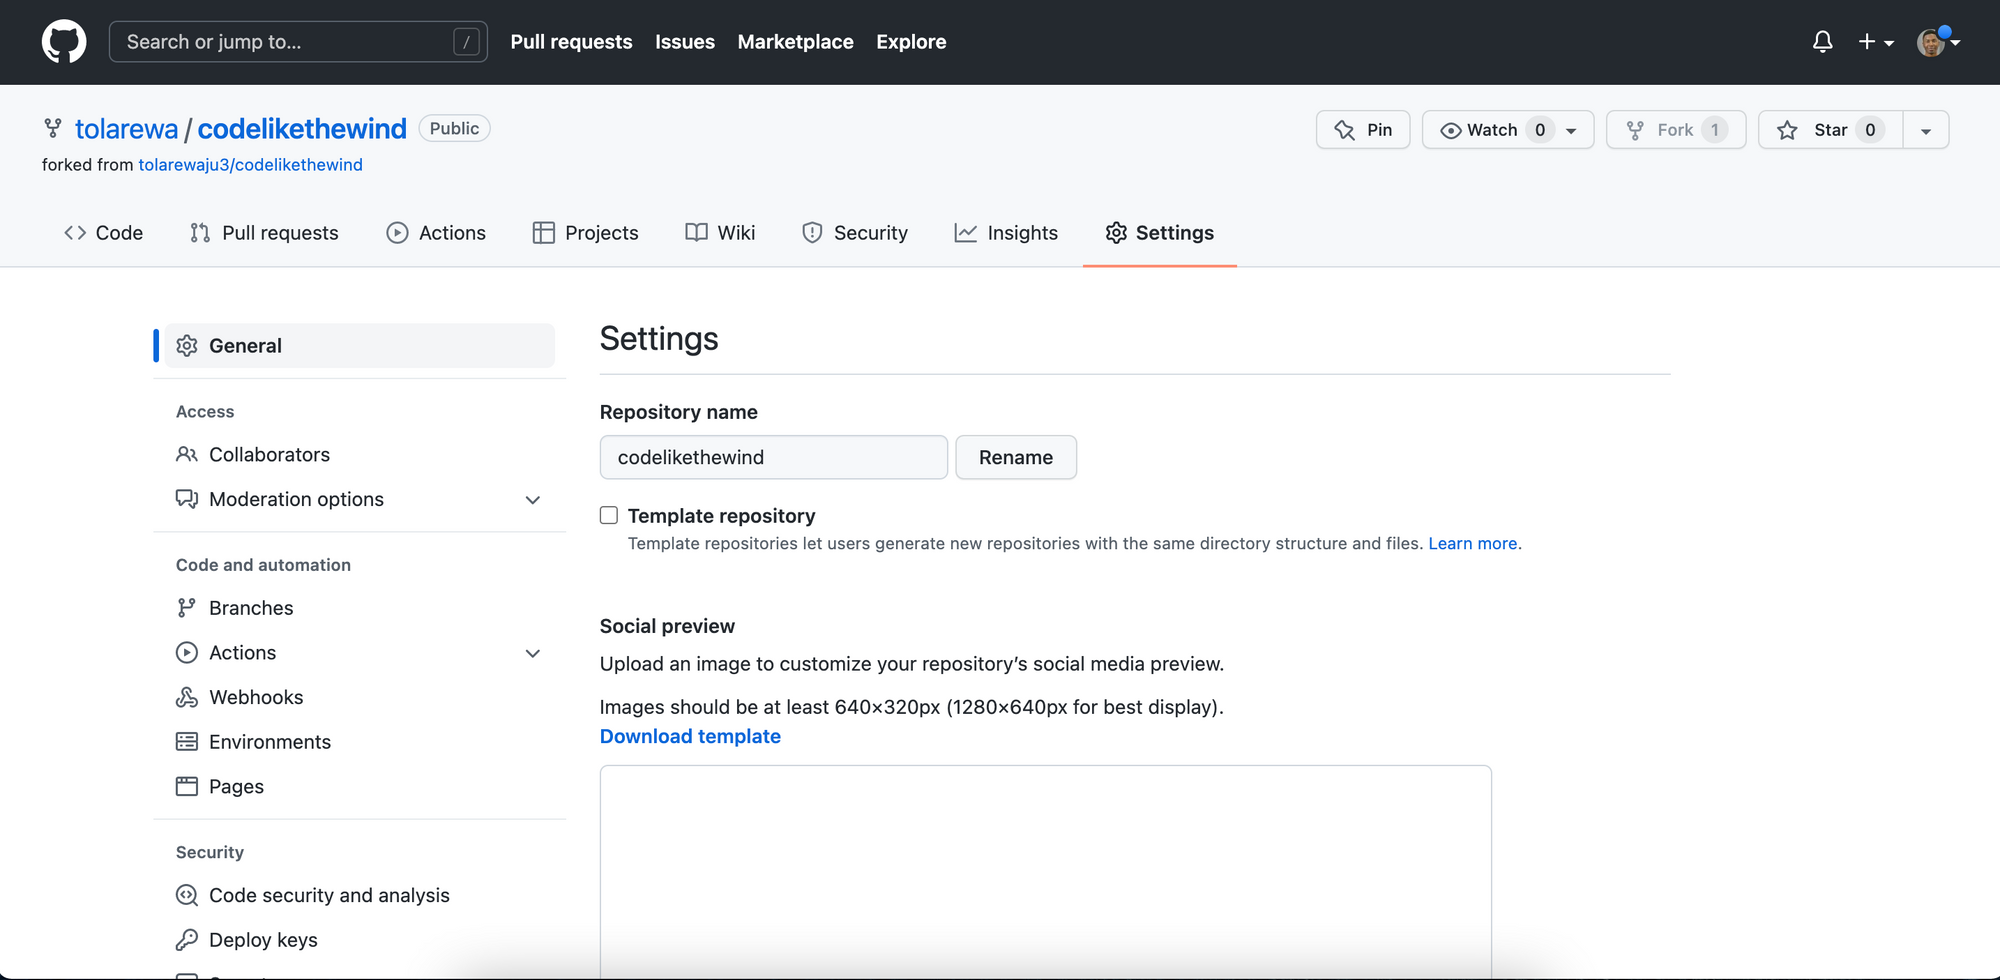
Open the webhooks section and create a new webhook with the following specifications:
Payload Url: <your_copied_webhook_url>
Content Type: application/json
Click Create Webhook.
If everything is setup correctly, our Jenkins pipeline should run every time we push to our repo. Let’s test it!
On your computer, go to the folder containing our servlet.
cd src/main/java/org/codelikethewind/servletOpen SimpleServlet.java and change the “Hello World” string to be “Hello <Your Name>”. Save your changes and push them to your repository.
Go back to your build config (my-pipeline) and click “Builds”. Select the newly started build and you should see the pipeline stages running.
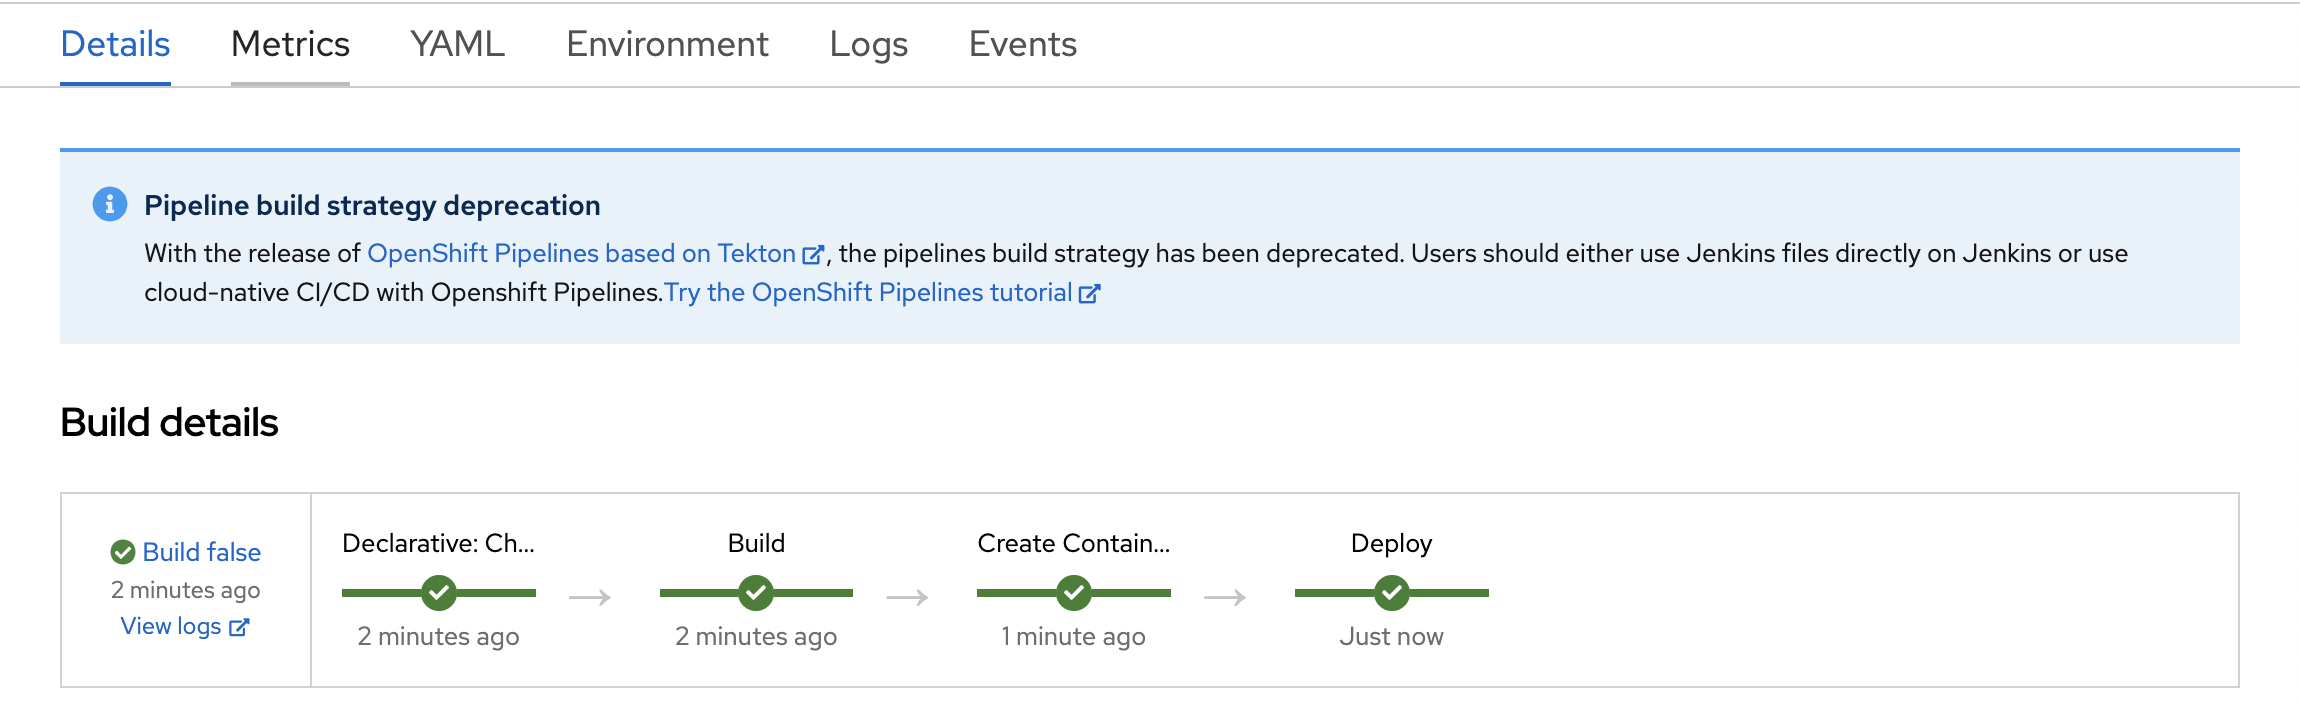
When it’s done, go back to topology. Click the application named codelikethewind, and find the route URL at the bottom. Navigate to <route_url>/simple-servlet-0.0.1-SNAPSHOT/SimpleServlet
You should see the screen with your updated message!
Best Practices
OpenShift comes with fully supported Jenkins images, but OpenShift Pipelines provides a cloud-native CI/CD experience. With OpenShift Pipelines, you can run pipelines natively on kubernetes without having to manage a build server. This is our recommended solution and I'll cover it in a later post.
Recap
Kubernetes is great for managing containers, but doesn’t do a whole lot for developers. OpenShift, however, helps you go from code to container. There’s built in support for Jenkins pipelines as well as an OpenShift client plugin for Jenkins.
During this tutorial, we created a Jenkins pipeline to build and deploy our container image from java source code. Then we created a build config in OpenShift to execute the pipeline from a webhook.
Project Code & Links