CodeReady Workspaces: Consistent Development Environments
CodeReady Workspaces helps us stop fighting with inconsistent development environments and focus on writing code.


You’ve just built a killer feature at your company.
You ran the unit tests and checked in the code. But as you watch the build, things start to break left and right.
You swore it worked on your machine. And when your team tries to help, they get a different set of errors in their environments. Now you’re wasting time fighting with environments instead of coding.
Does it really have to be this way?
It Works On All Machines
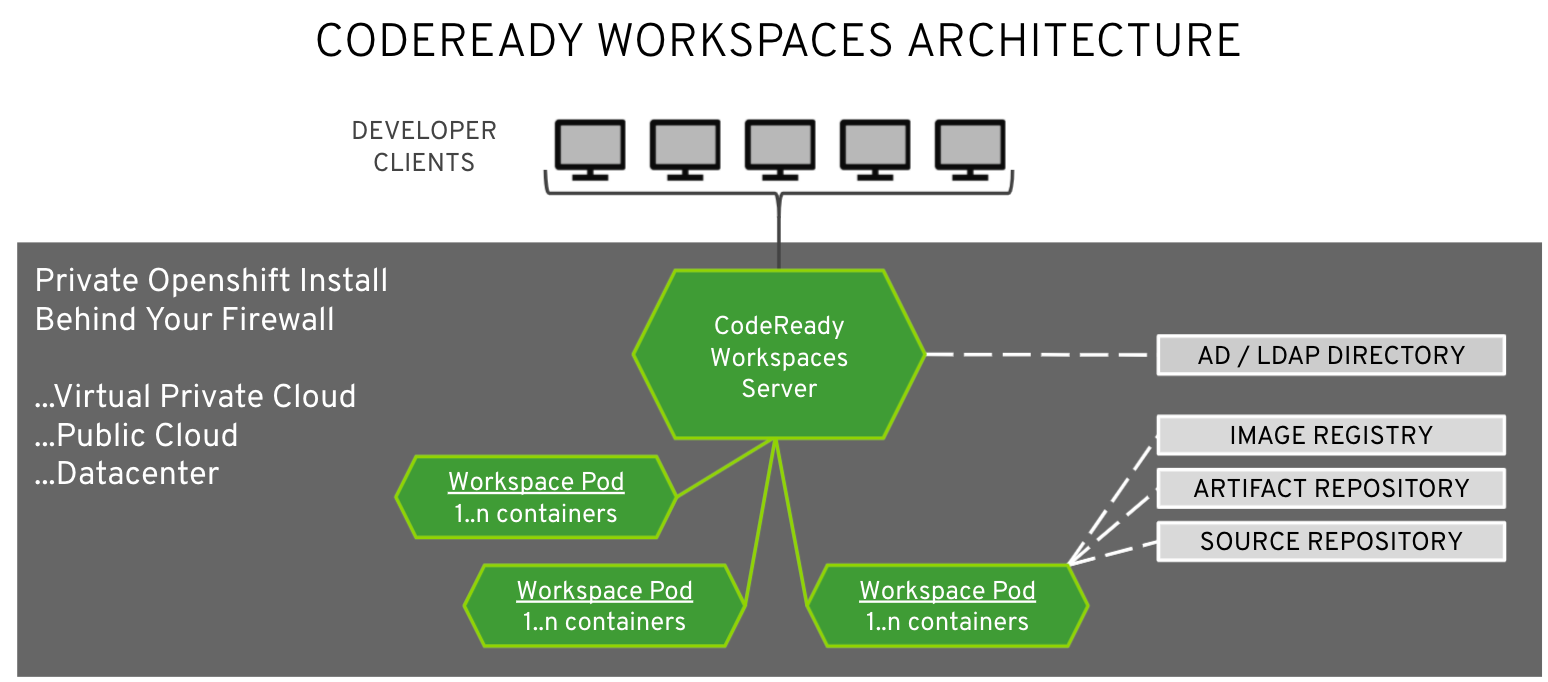
CodeReady Workspaces is a development environment in the cloud. It allows us to create consistent environments in one click -- which makes development, troubleshooting production issues and onboarding new developers much faster.
Instead of fighting with environments, we can just focus on writing code.
Creating Consistent Environments
Troubleshooting production issues with inconsistent environments is a nightmare. Before you reproduce the issue, you have to jump through all these hoops just to get the correct environment.
With CodeReady Workspaces, you can reproduce an environment in one click. Today, we’ll see how easy it is to set up a development environment and troubleshoot an issue.
Step 1: Sign Up for CodeReady Workspaces
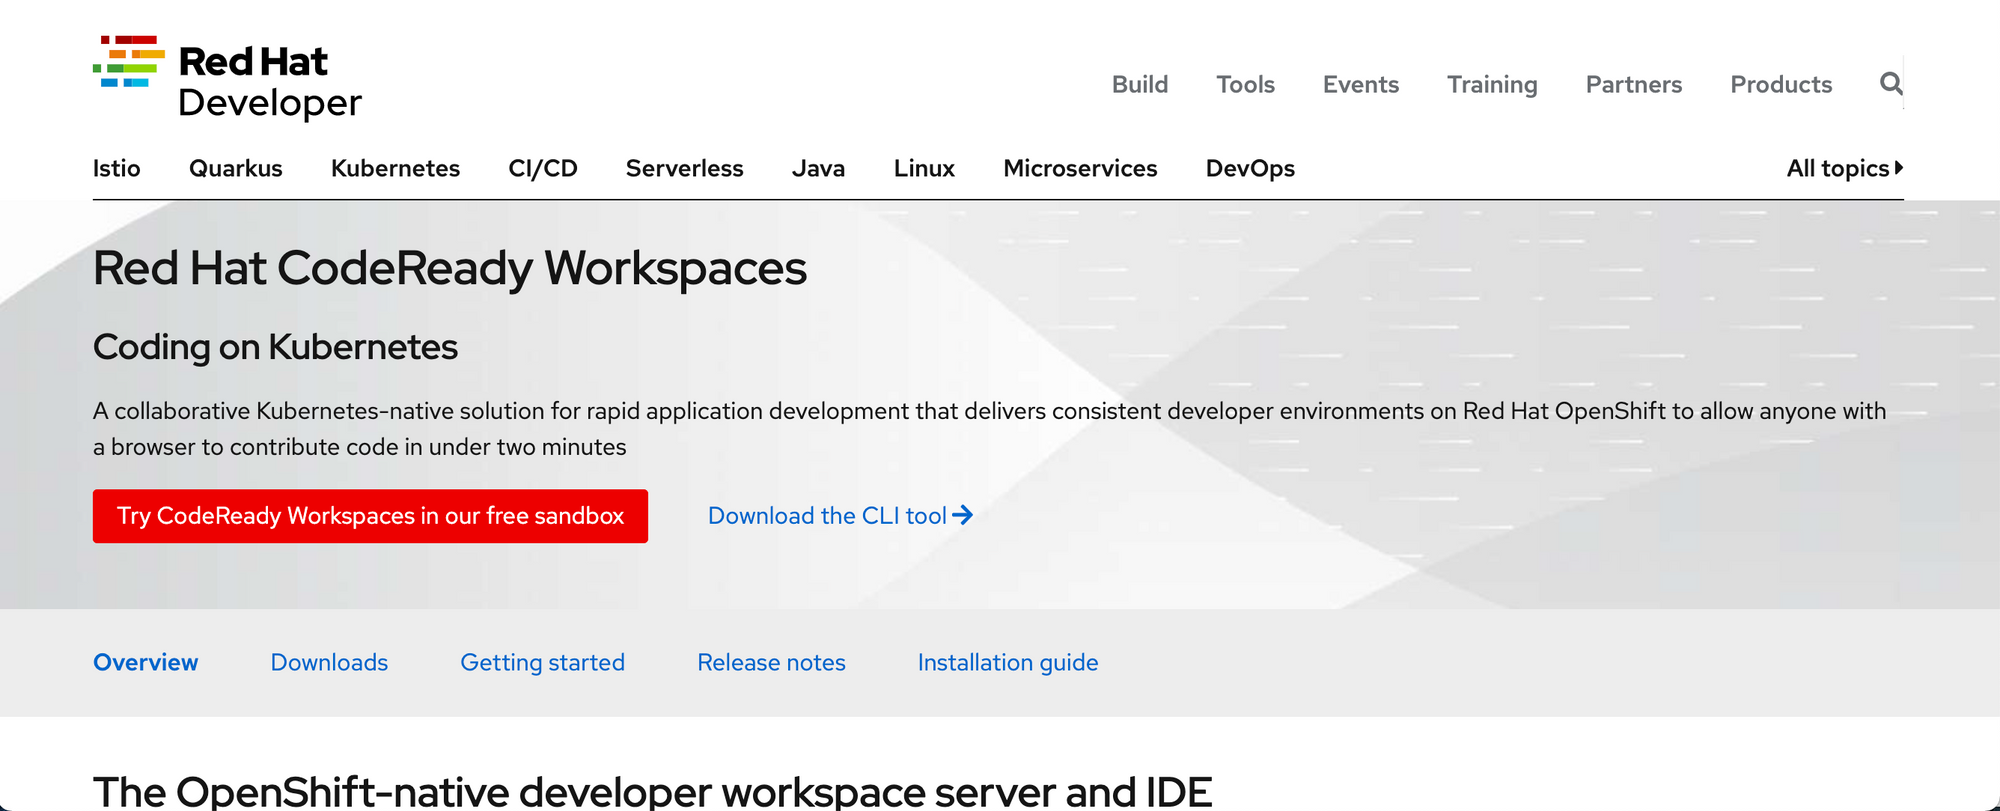
The quickest way to get started with CodeReady Workspaces is to sign up for a free account on the RedHat Developer website. Go to the Developer website here and click on “Try Code Ready Workspaces”
Click on “Launch your Che Developer Sandbox”. You’ll be prompted to set up an account if you don’t already have one.
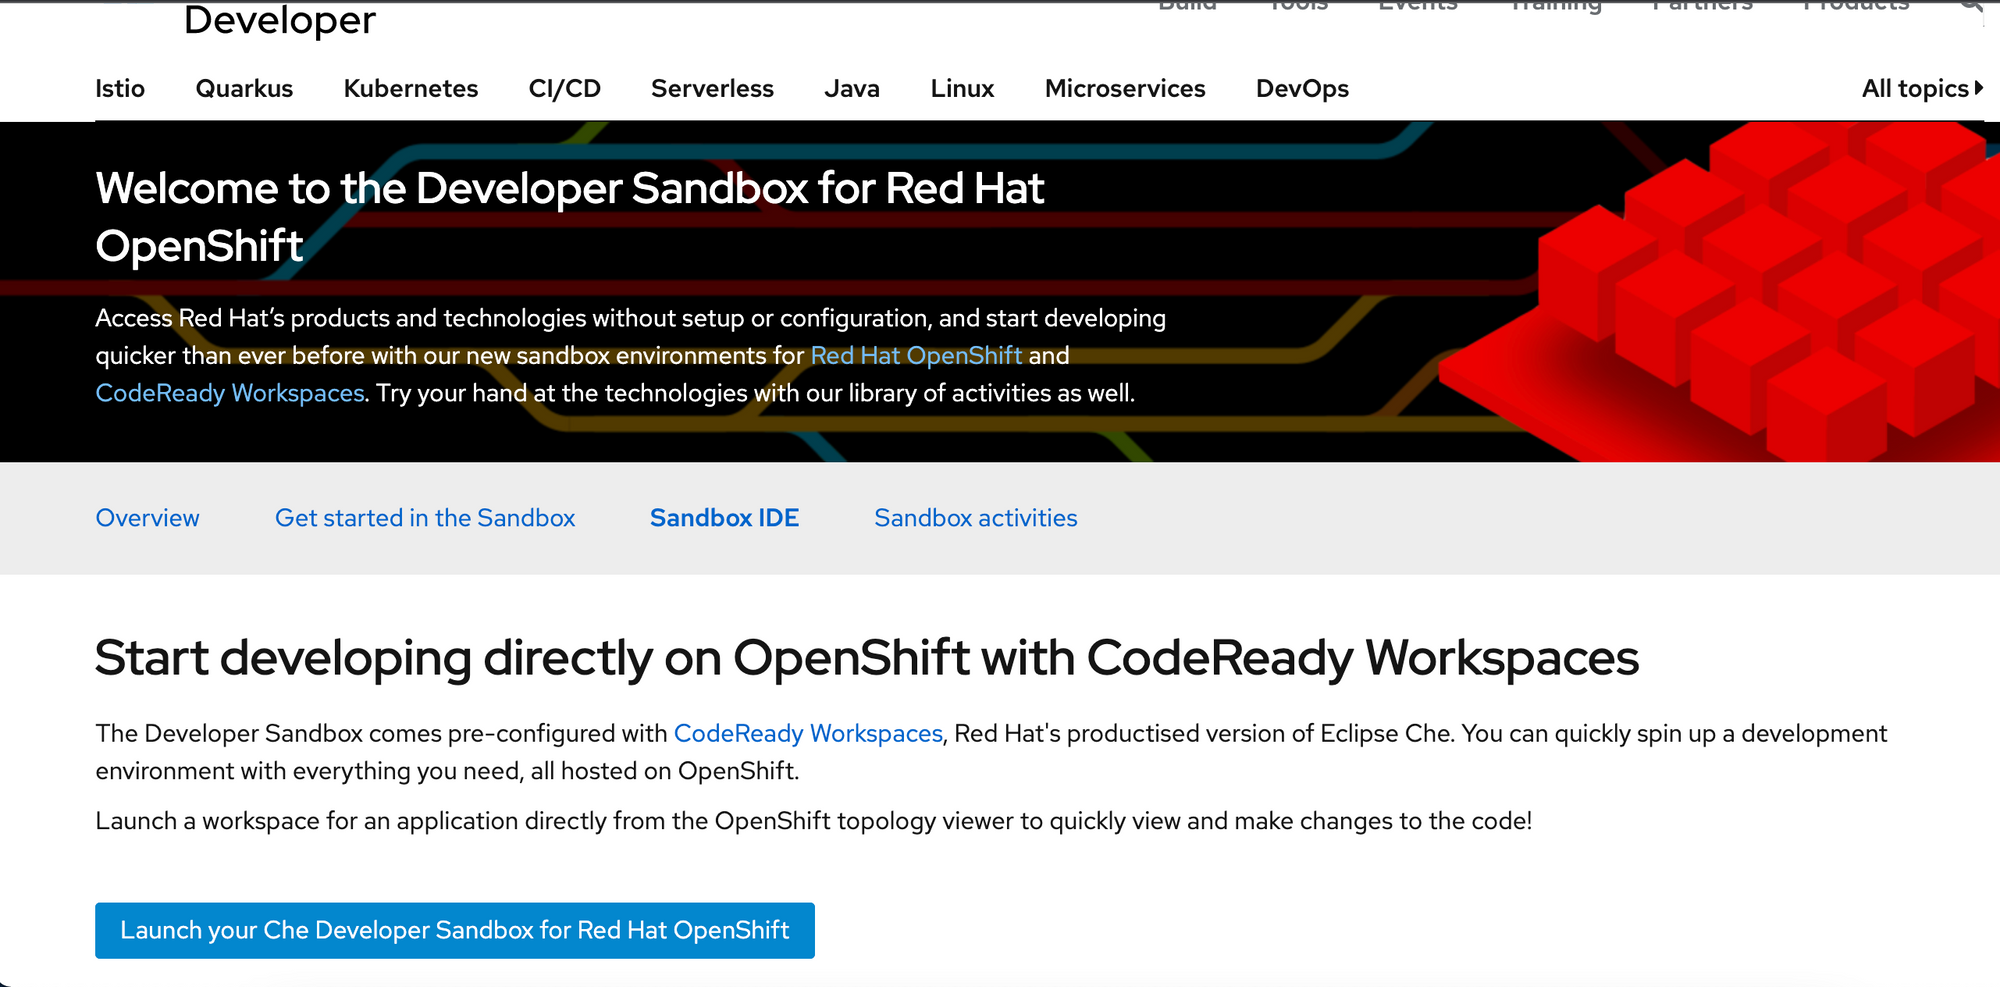
CodeReady Workspaces can run wherever OpenShift (Red Hat’s container platform) runs: on prem, public cloud, bare metal. But to get set up quickly, we’ll use the cloud.
When you’re done, you should see the workspace screen.
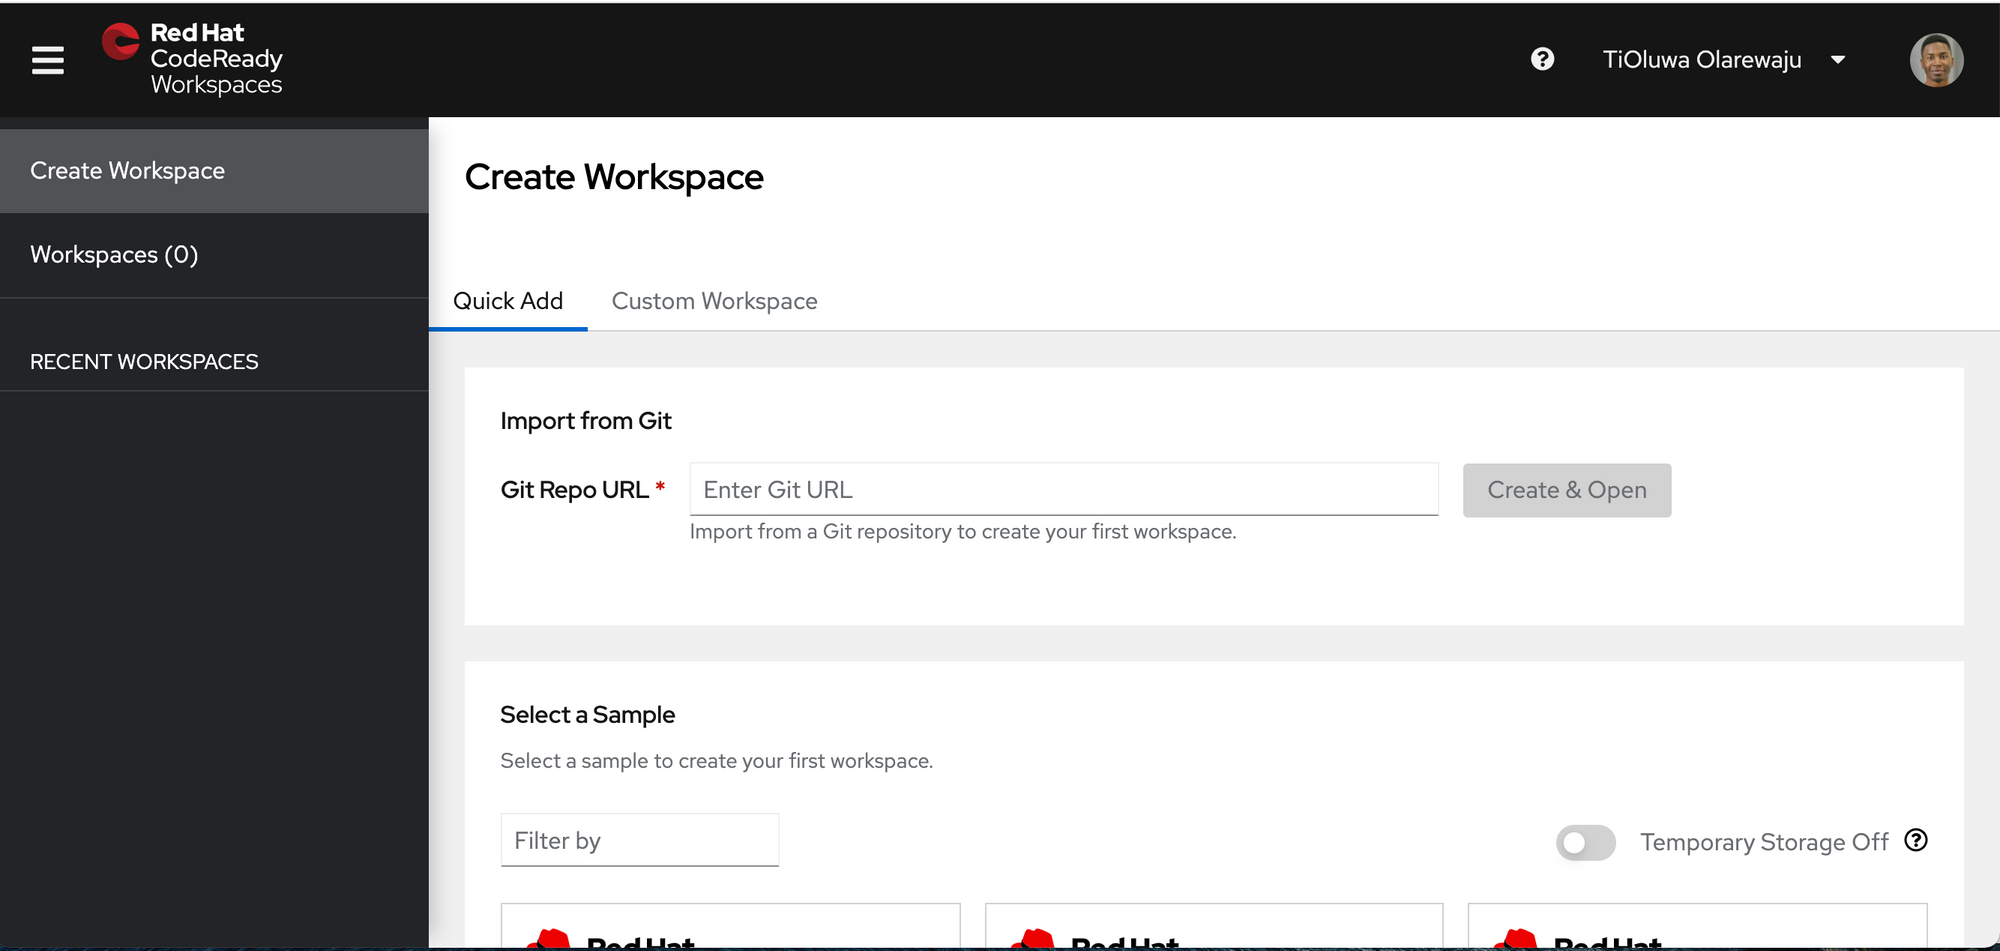
Step 2: Create a Workspace & Reproduce the Bug
CodeReady makes it really easy to recreate the environment where a bug was found and reproduce it. In the Create a Workspace tab, click "Custom Workspace".
A workspace includes the source code of your project, the IDE, and a replica of the production environment. This makes sure what we’re building will run the same everywhere.
Paste the link to my devfile (below) in the “devfile URL” box and click on "Load Devfile"
https://raw.githubusercontent.com/tolarewaju3/codelikethewind/codeready-bug/devfile.yaml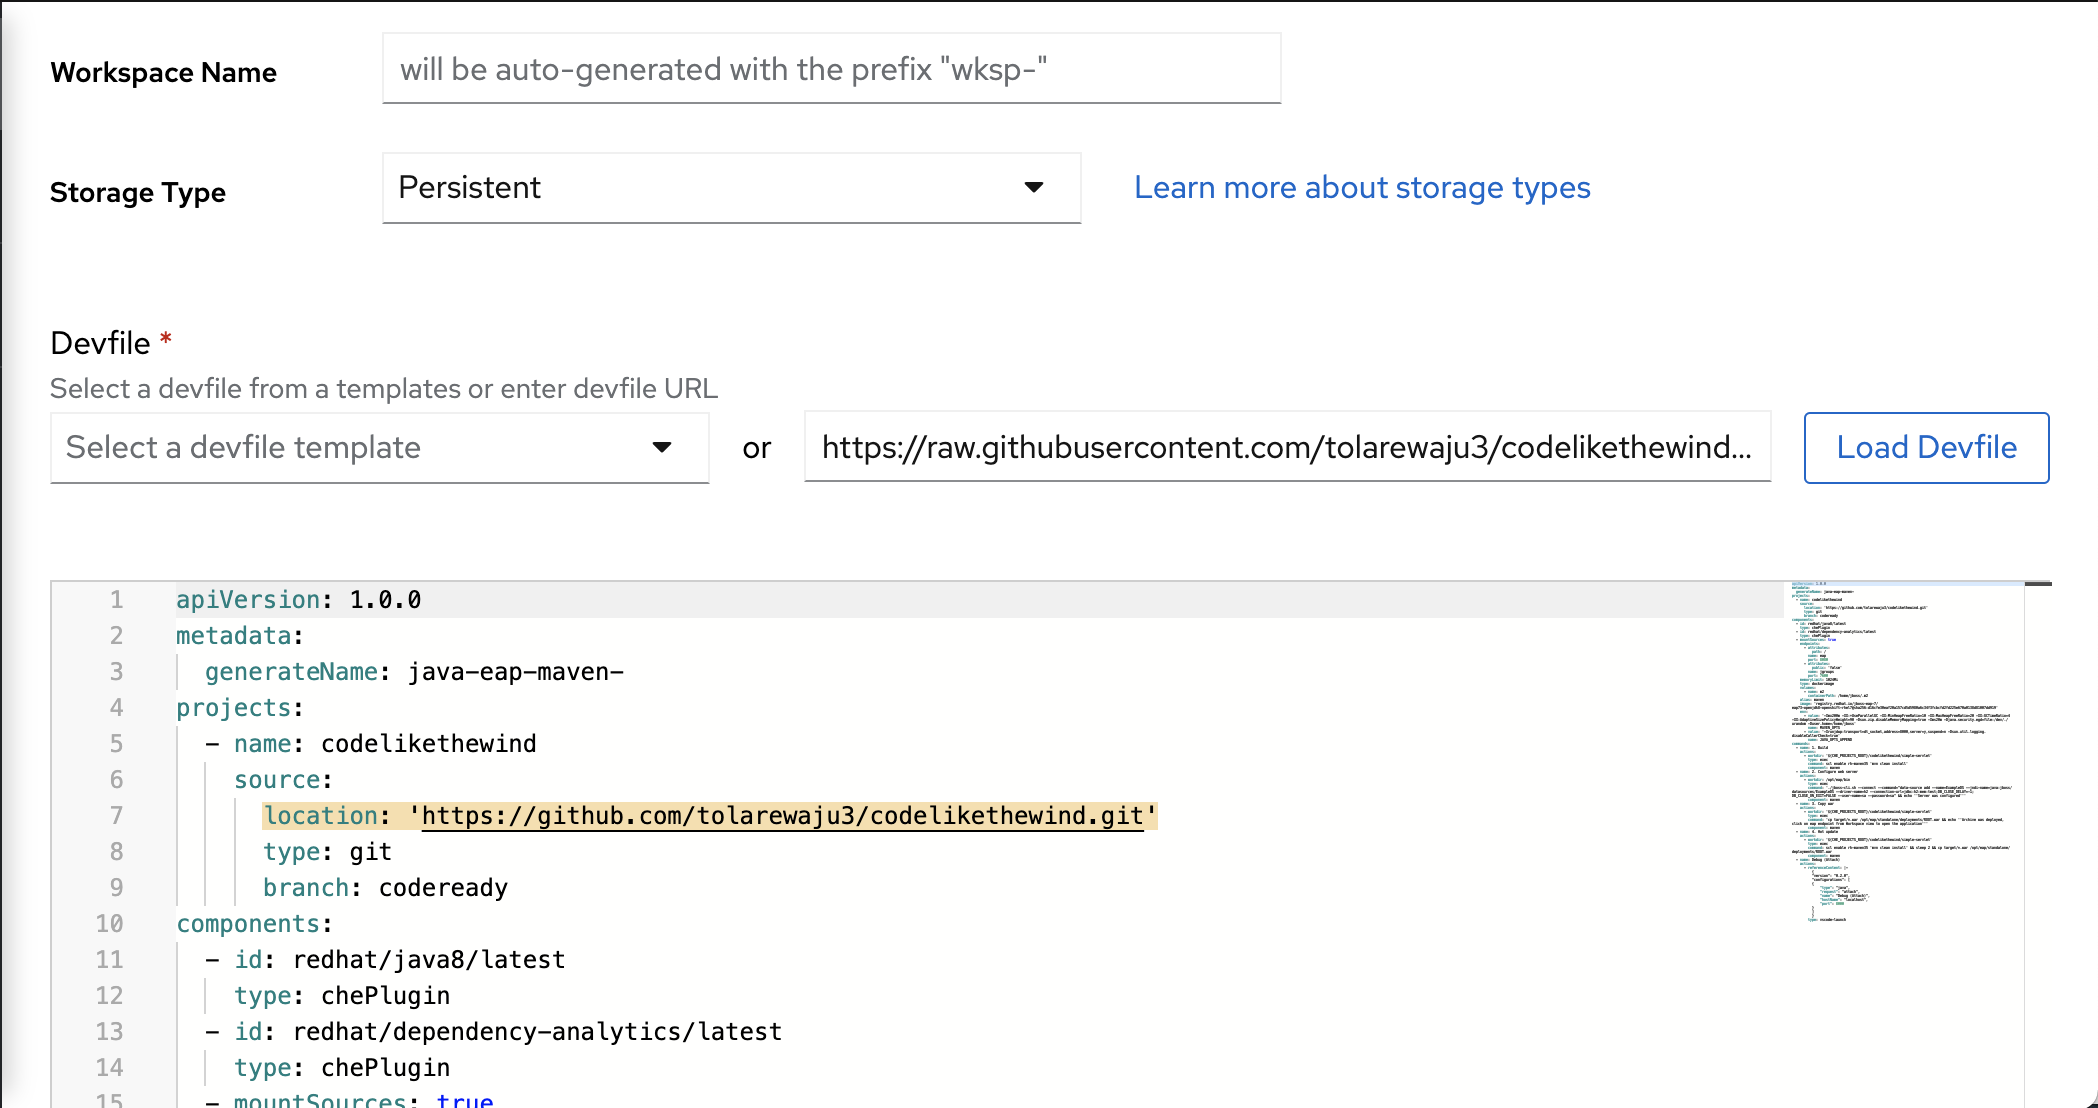
Click "Create and Open" to create your workspace.
Workspaces are defined by a devfile. These “dev environment as code” files describe the runtime, source code, and ide/configs we want to use. Devfiles make our workspace shareable -- just like a piece of code.
Workspaces can be shared by links too. You can even have your CI/CD system place workspace links on failed builds so that you can recreate problems in one click!
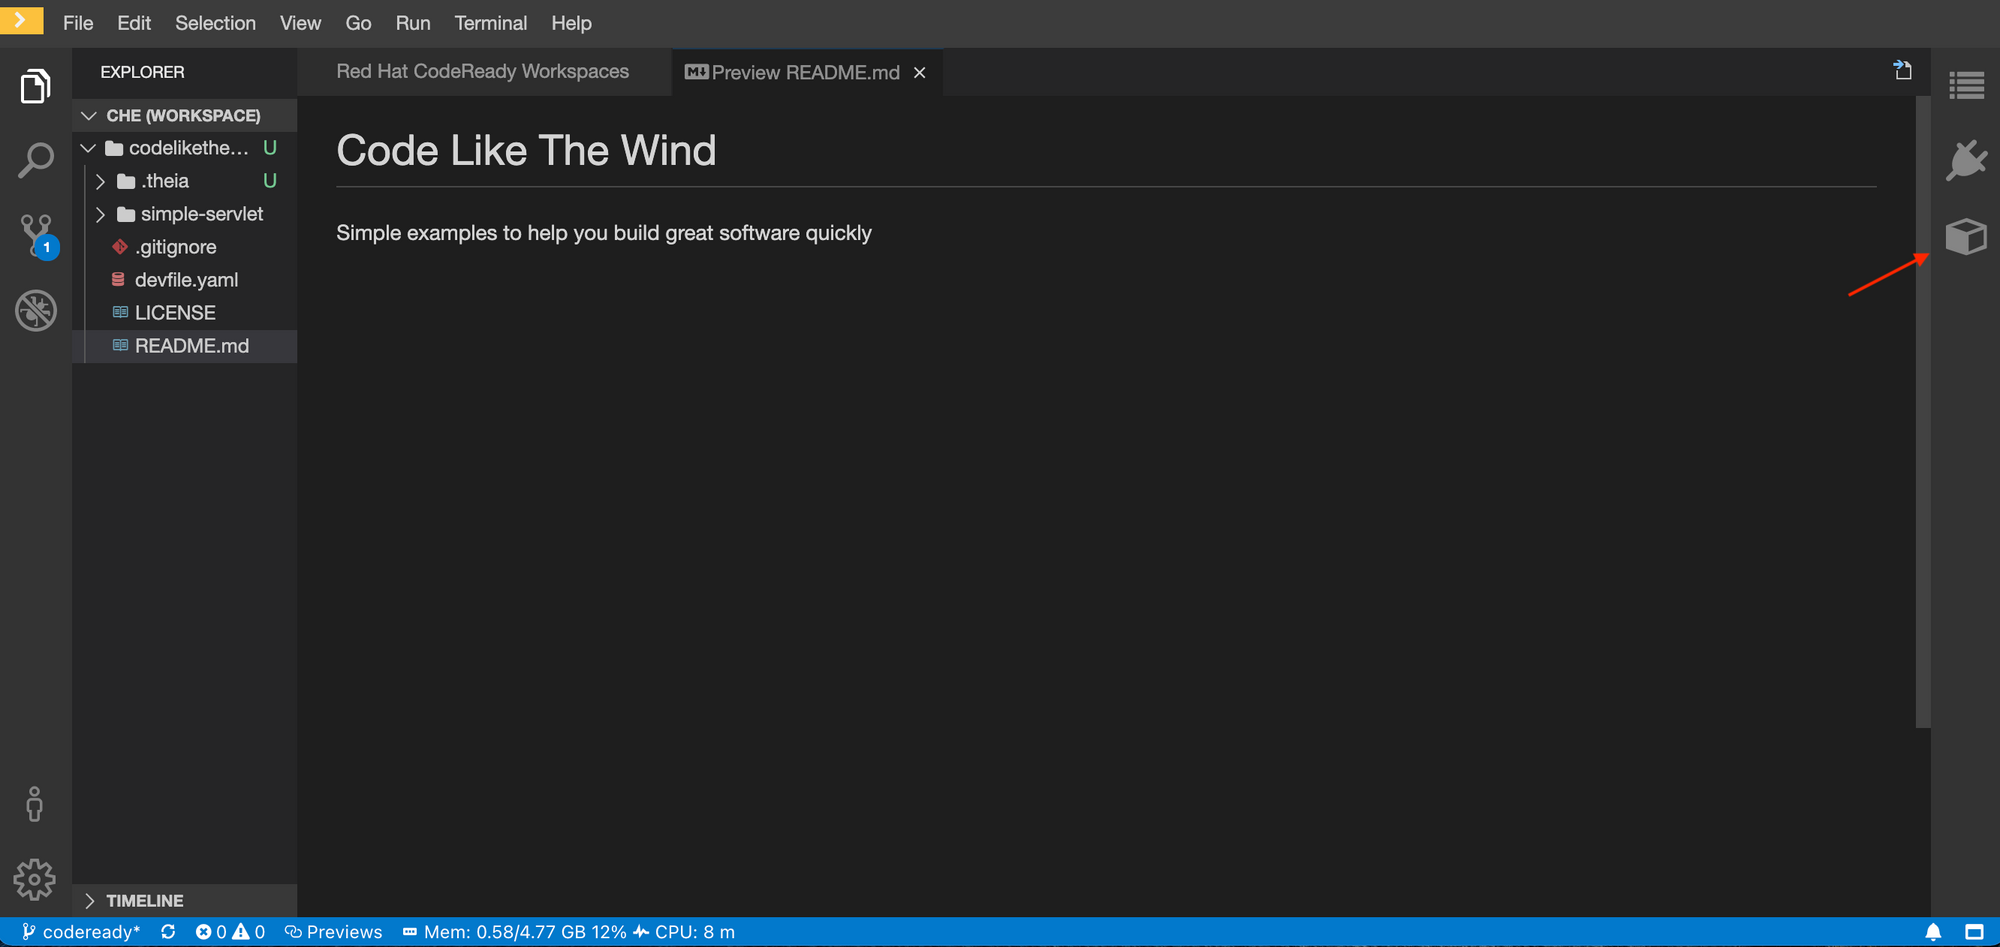
After you wait a while, your workspace should be up and running.
Step 3: Fix the Bug
Now that we have a replica environment, we need to reproduce and fix the bug. In the right pane, click the workspace tab and hit “Build”.
The maven build should fail. Again, it’s using the exact application runtime used when the bug was found -- so there’s no fear that it’ll build differently. See if you can fix the bug!
When you’re done, you should see a successful build.
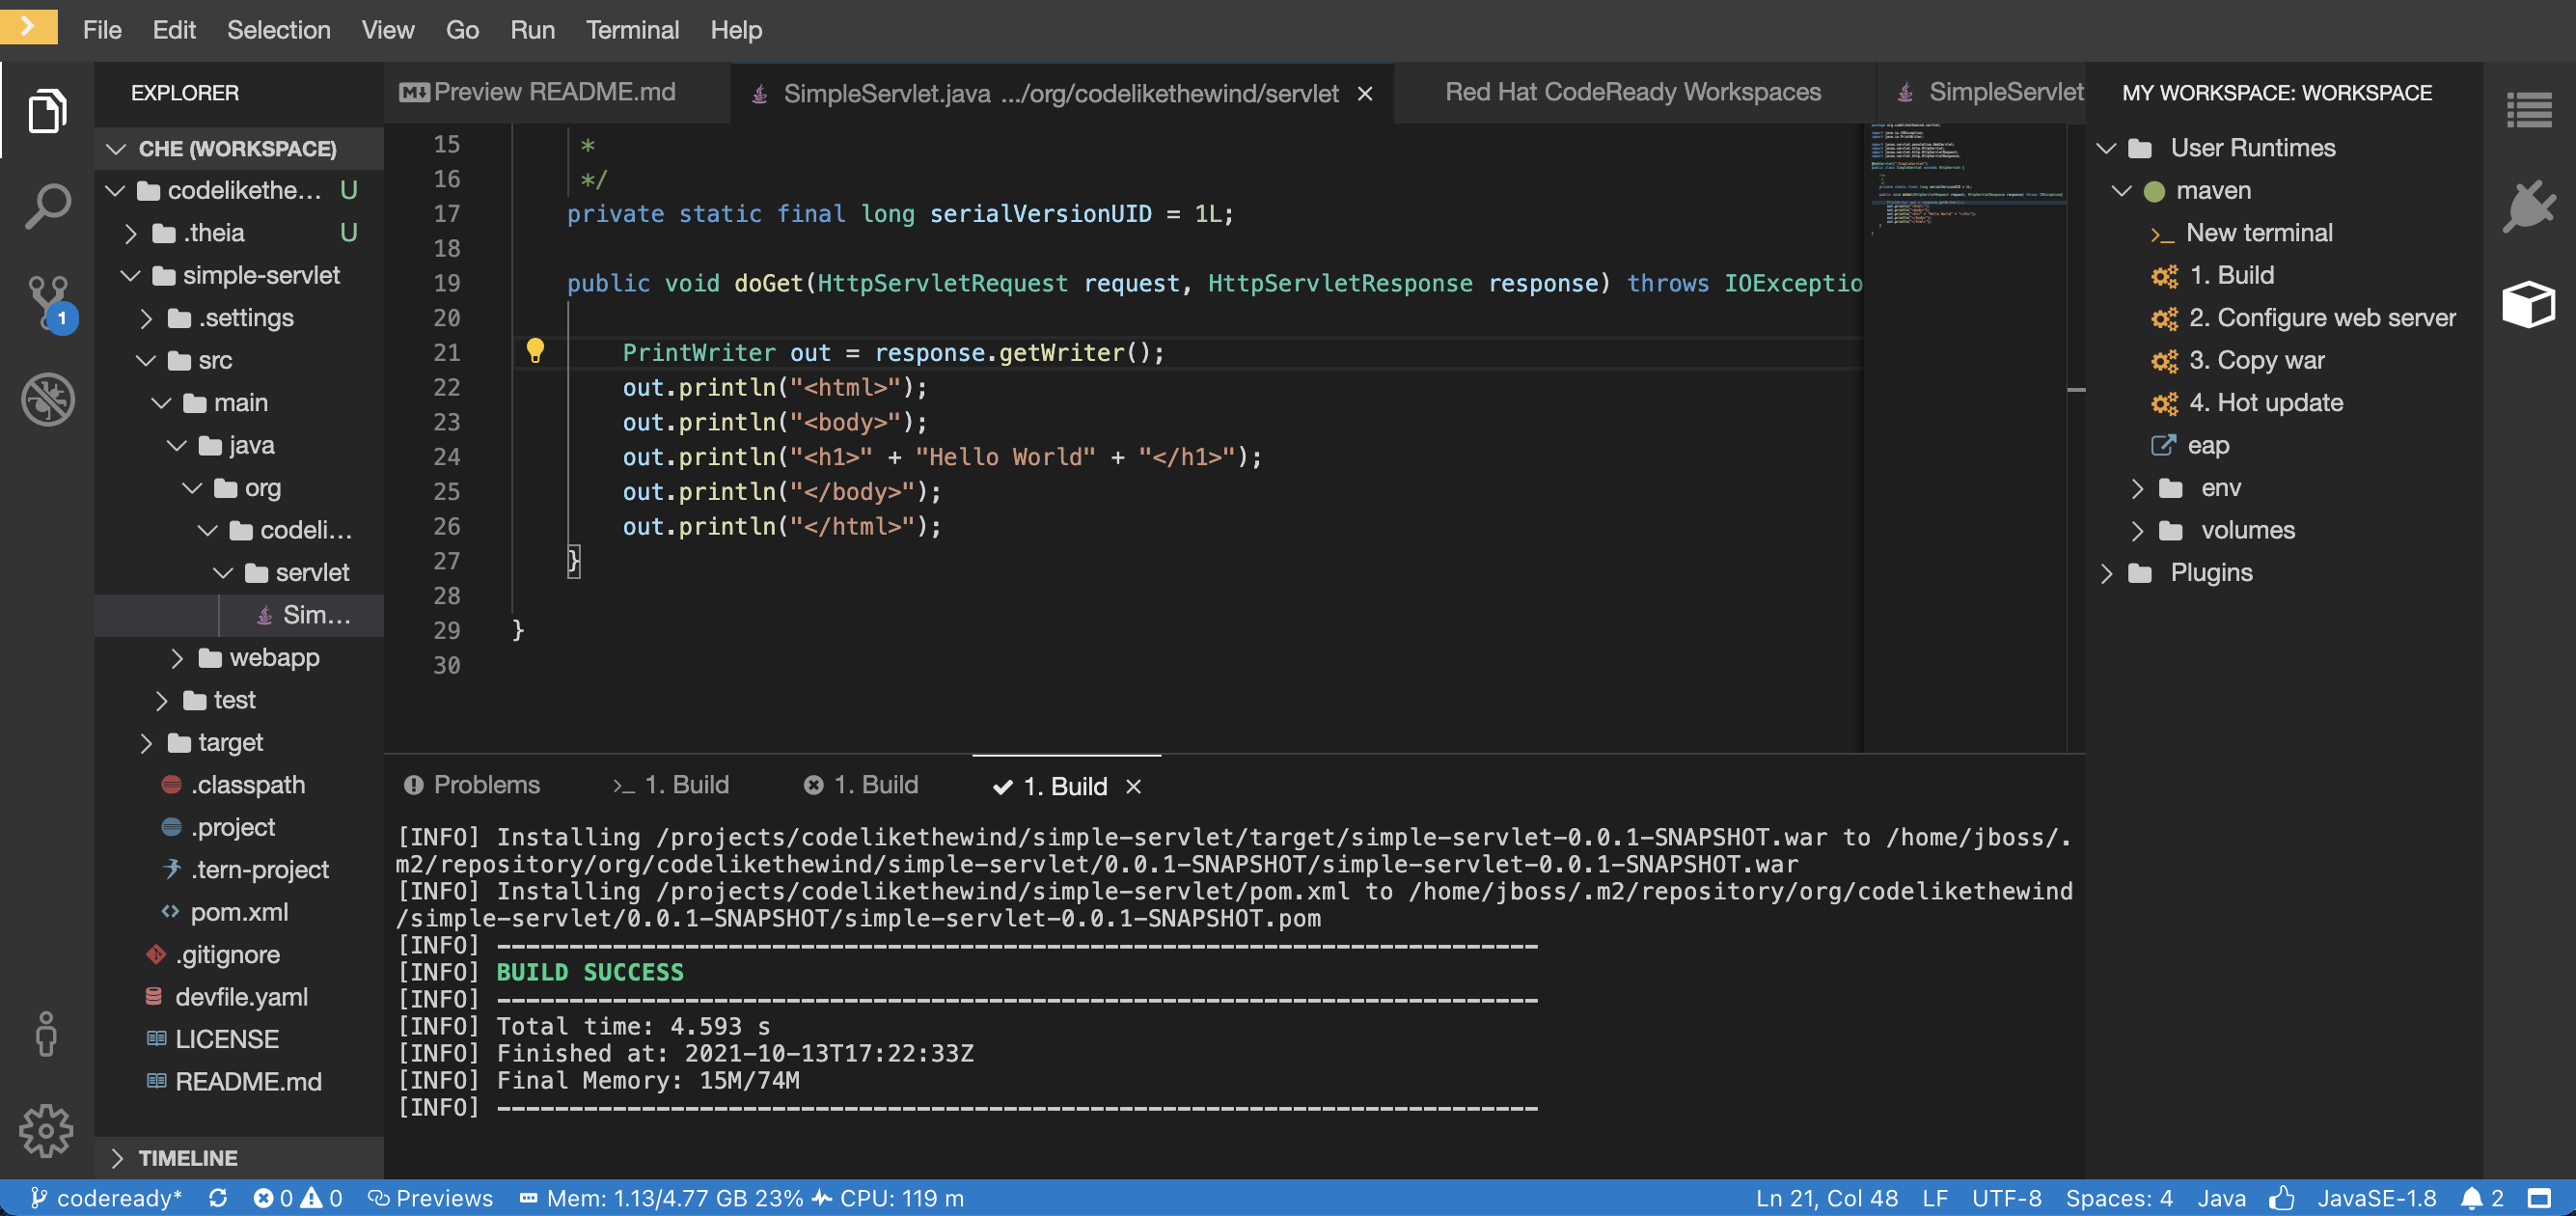
Next, we’ll deploy our code to the server. A container running JBoss EAP is also included as part of our developer environment.
In the right pane, click “Deploy”
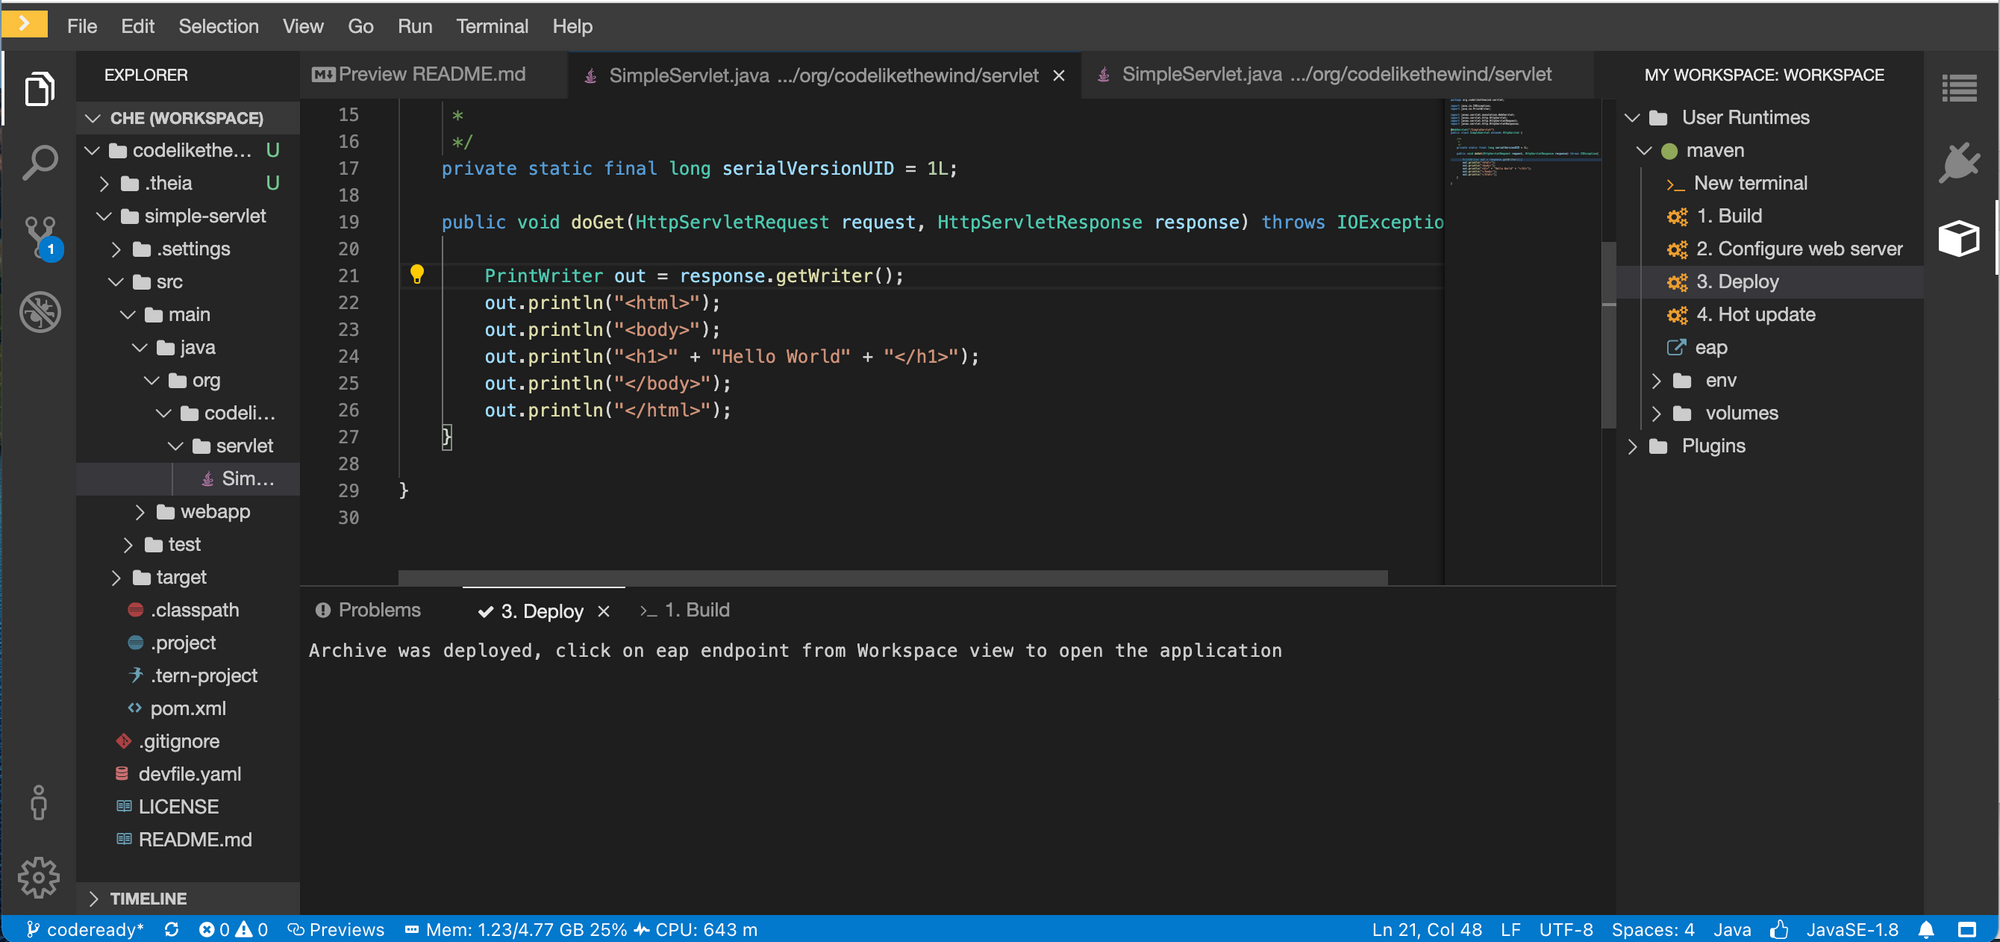
We'll check that everything deployed successfully. In the right pane, you should see a task called “EAP”. This is our application server. Go ahead and click that. You should see "Hello World"
This application url is immediately exposed to the world. Or, when running in your own OpenShift cluster, it’ll be exposed to your organization. This makes it easy to share your work with other teammates.
Best Practices
CodeReady comes with some generic, pre-built workspaces (EAP 7, Spring boot etc). Instead of using these, it’s recommended to have a team lead or architect create a custom devfile. They can define the runtimes, project source, and IDE configurations to be used by the whole team.
And as with any configuration file, always check it into version control.
Recap
CodeReady Workspaces helps us create consistent development environments in one click. In this tutorial, we saw how easy it is to setup a development environment. We used a Devfile, which defines an environment, to reproduce an error in a matter of minutes -- not hours.
Project Code & Links
- Source Code and Devfile
- How to get rid of "It works on my machine!" with CodeReady Workspaces
- Installing CodeReady Workspaces in Your OpenShift Cluster
Happy Coding!
-T.O.