Serverless: Save Money by Laying Off Servers, Not People
In a (pre-?) recession, we're all looking to do more with less. Serverless helps us only pay for computing resources that we use.

So we’re in a (pre-?) recession.
And when everyone is looking to cut costs, the first place they go to is laying people off. Which is one way to save big money.
But it’s not the only way.
One of my customers is a large financial institution. Many of their applications receive traffic only at certain times. For the rest of the day, those servers twiddle their thumbs.
Instead of laying off people to save costs, what if we could lay off some servers?
Why do we use Serverless?
Serverless allows us to only pay for what we use. It’s an on-demand computing model where developers build & run software – without managing servers.
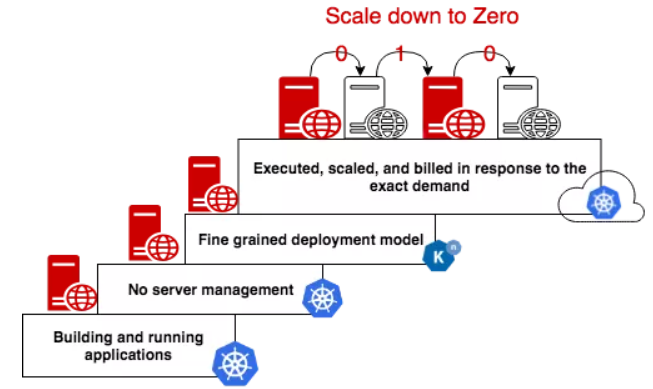
Serverless can save you money anywhere. In the cloud, you spend less because you only pay when code is executing. In your datacenter, you can share servers for applications that don't run simultaneously and buy less hardware.
Serverless is great for:
- Unpredictable Demand - Scale up and down with ease
- Trigger-based Processing - Usually asynchronous & only run when needed
- Enterprise Integrations - Similar to above. If you’re in this boat, check out Camel-K.
When Not to Use Serverless
Buzzwords often get tossed around as a “cure all”. So before we dive into how to use serverless, let’s look at what isn’t a good fit.
- Constant Workloads - Especially in the cloud, you may not incur the cost / management benefits of Serverless.
- You Need Fast Response Times - Since serverless applications aren't always running, there is time involved in starting them.
- You Need Advanced Monitoring / Debugging - Since we’re not managing the servers, we give up some of the ability to monitor or debug.
How to Use Serverless
What You’ll Need
- A basic understanding of Kubernetes
- hey installed on your system
We’ll set up our serverless stack using OpenShift – a kubernetes application platform. When we’re done, we’ll have a system that scales up and down based on demand.
Step 1: Deploy a Serverless Application
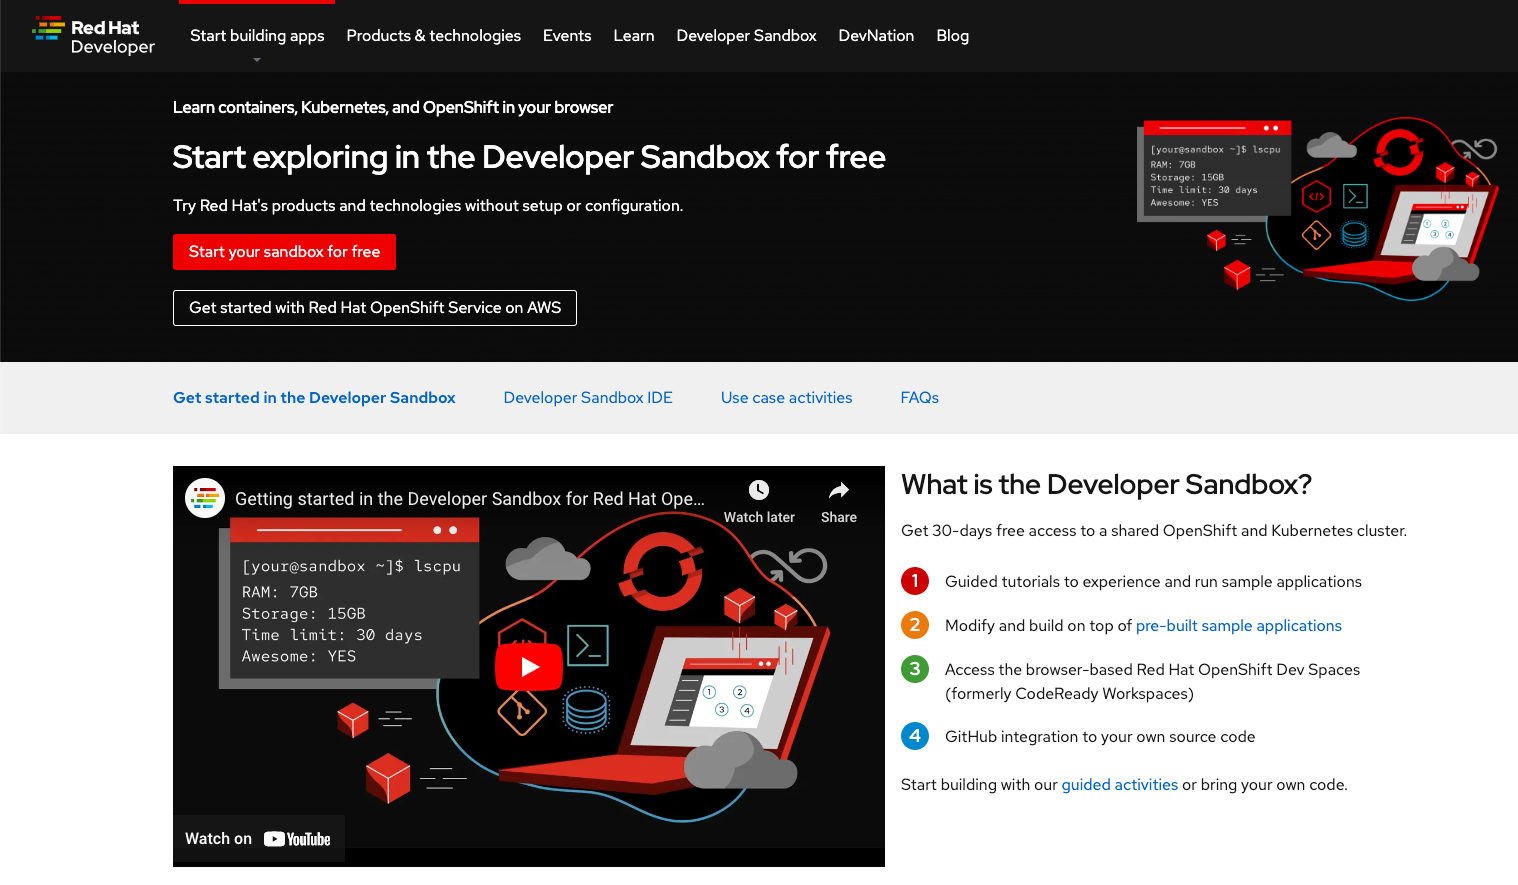
First, we’ll set up your OpenShift environment. The easiest way to do that is to create a developer sandbox. You can get one of those for free here.
Once your sandbox is set up, we'll set up OpenShift Serverless. OpenShift Serverless is based on Knative – a project that helps us build, deploy, and run serverless applications.
Next, let’s deploy our serverless application. Select the “Add+” button and click on Container Images.

We’ll be deploying a simple Quarkus application. If you’ve never used Quarkus, you can think of it as container-native Java. And if you’re a developer, you should REALLY consider using it.
Under the "Image name from external registry" field, enter the url for our container image:
quay.io/rhdevelopers/knative-tutorial-greeter:quarkus
Scroll down to the bottom and select, “Resource type”. Change it to “Serverless Deployment”
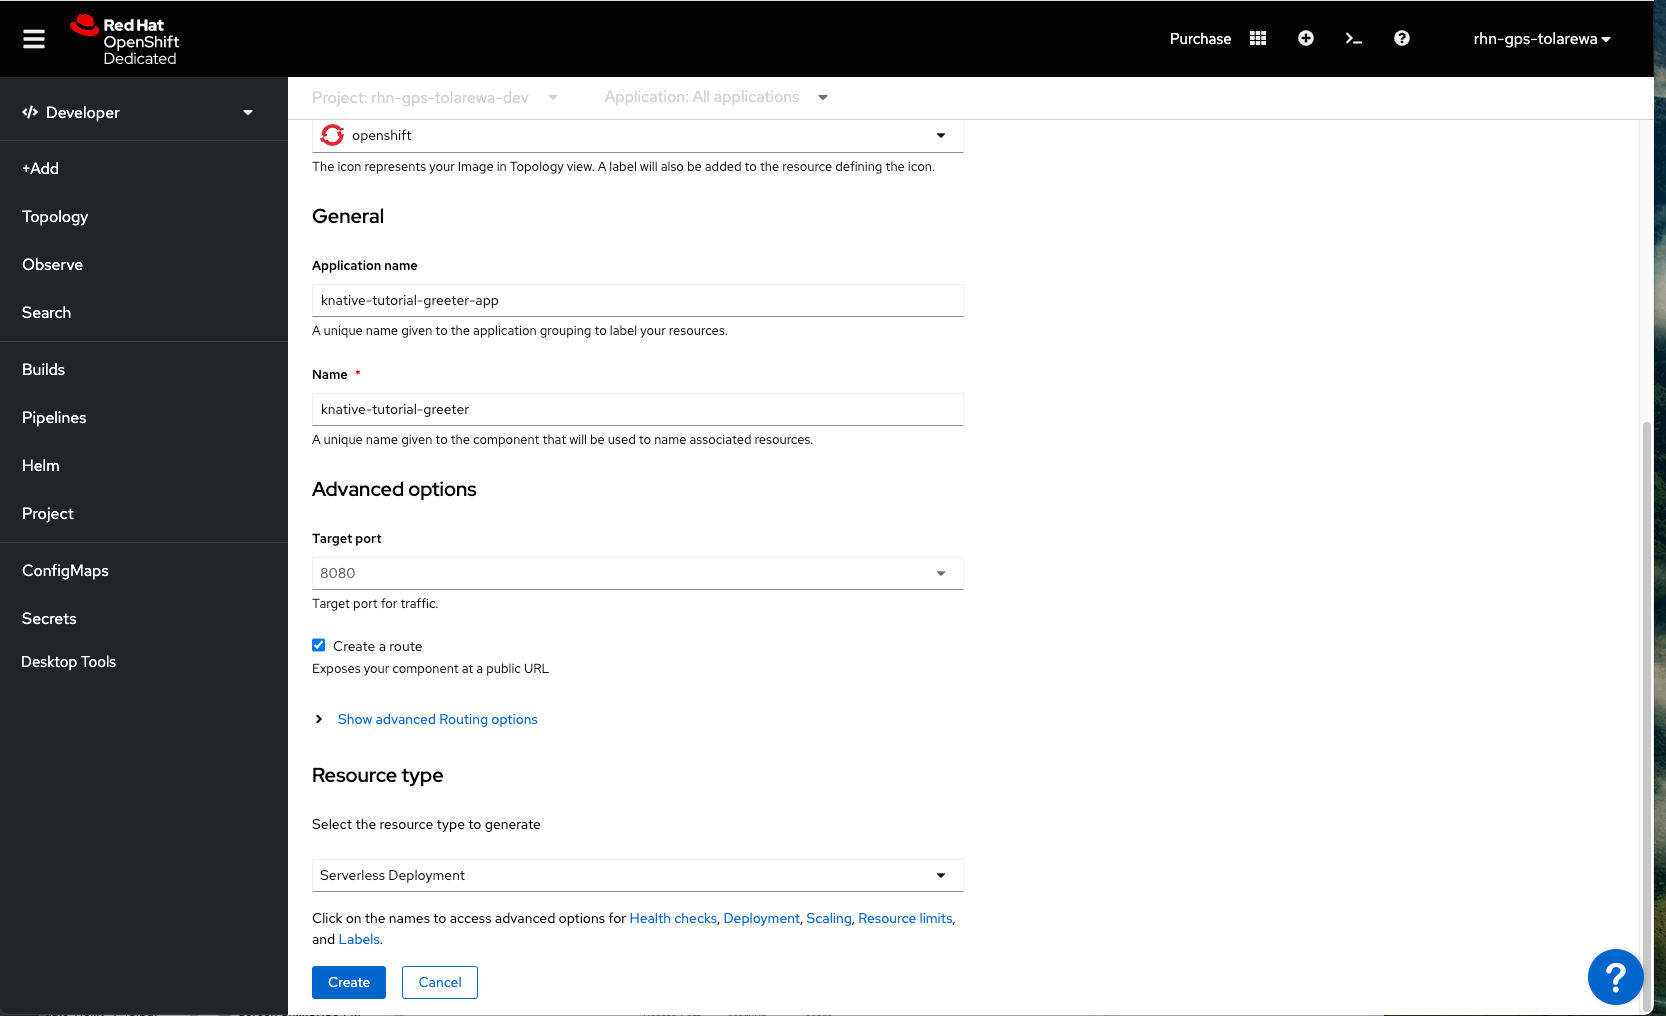
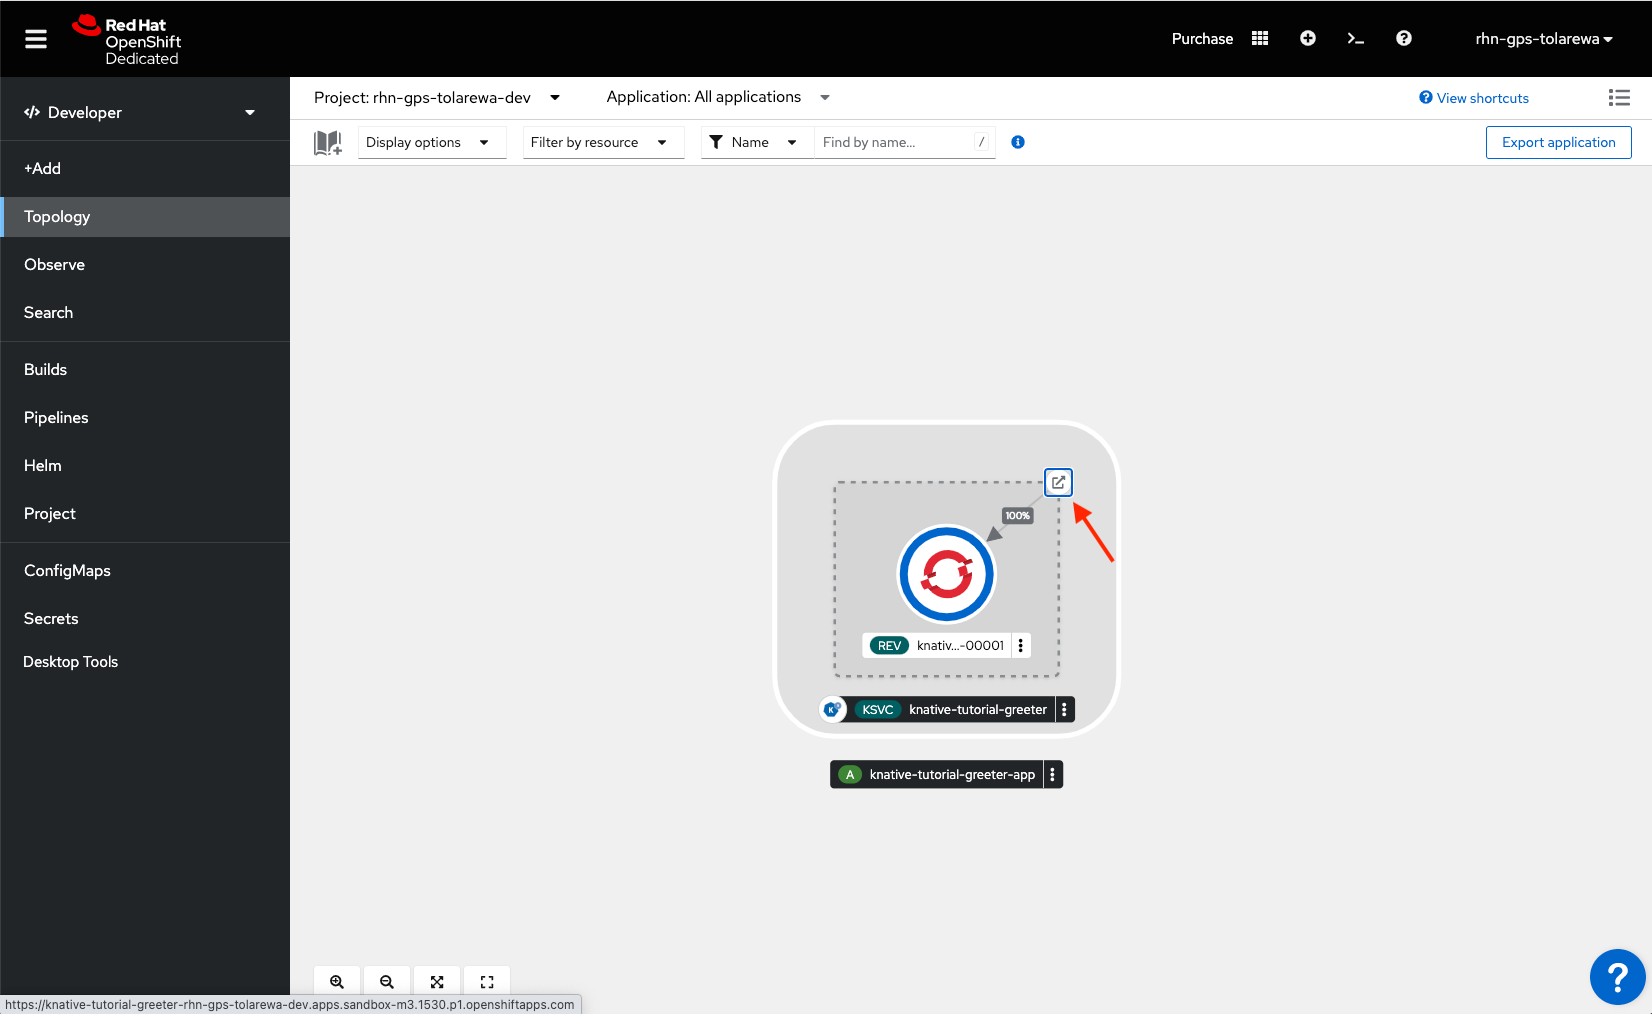
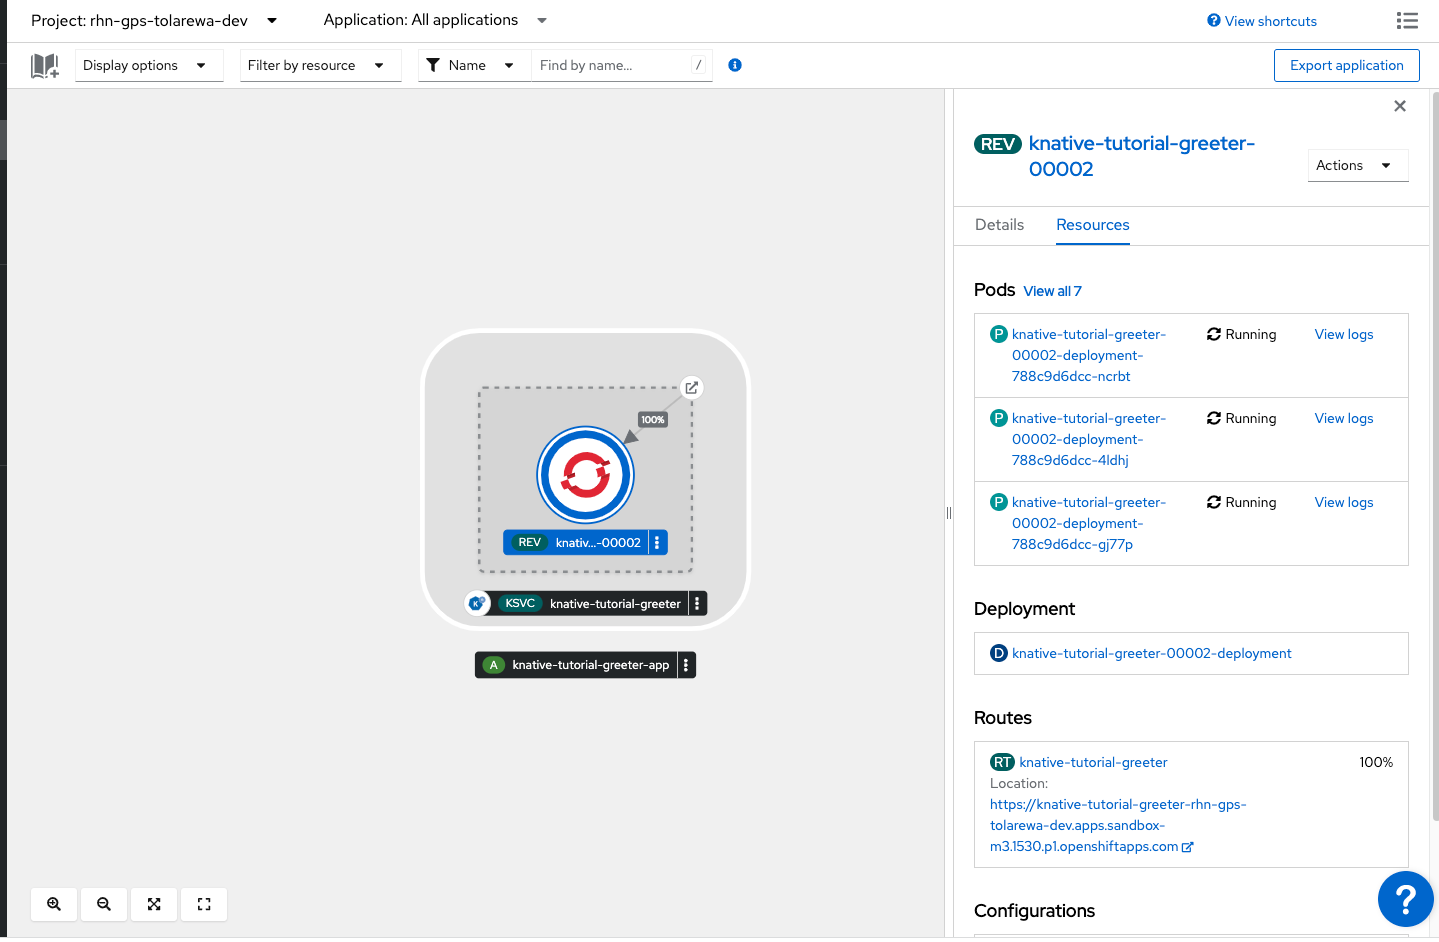
Click “Create”. This should take you to the topology view. You should see our application being created. When it's done, you'll see a blue ring.
To view the application, click the url button in the upper right corner.
Close that browser tab and wait for 30 seconds. You should see the application scale down to zero after not being used.
Nice work! We have a serverless application deployed.
Step 2: Scale an Application Based on Requests
Now that we have our serverless application deployed, we’ll see how it can scale based on the number of requests.
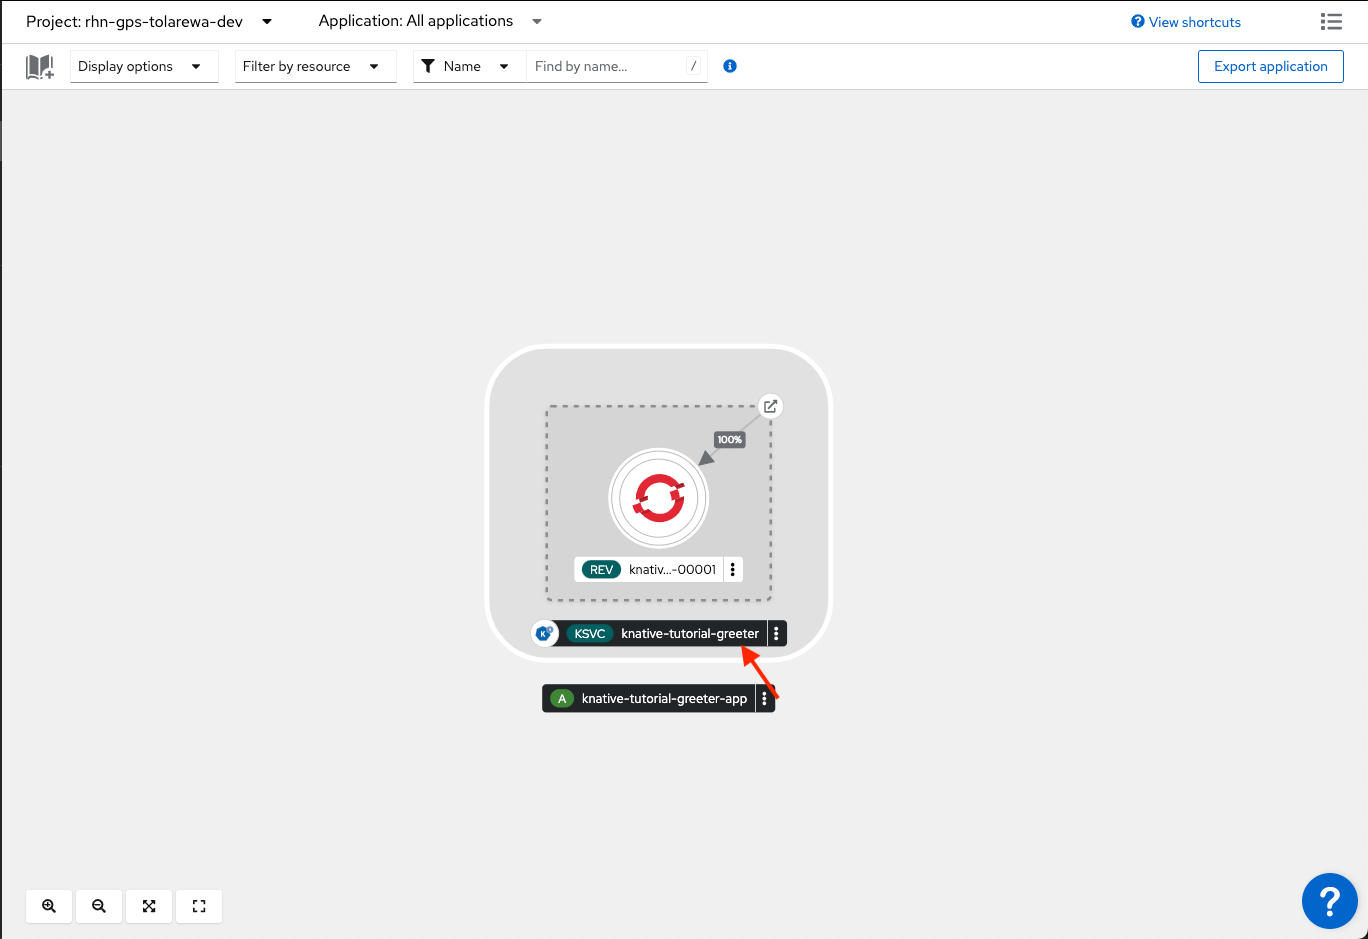
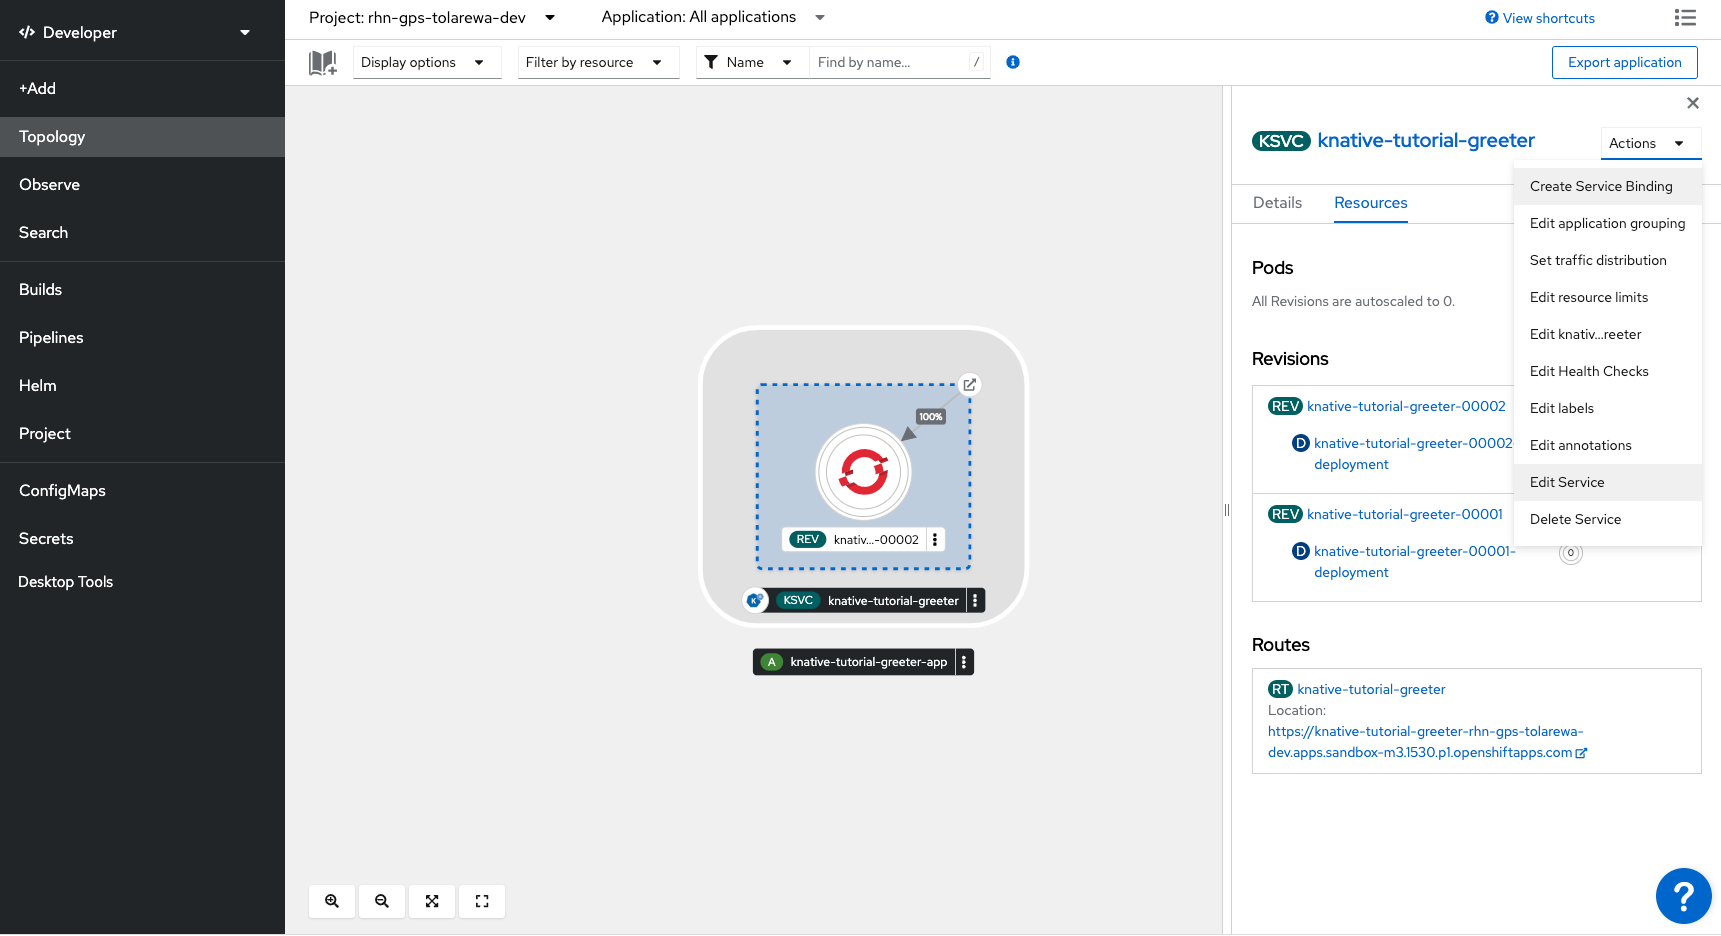
First, we’ll open the knative service that was created when we deploy the application. In the topology view, select the service.
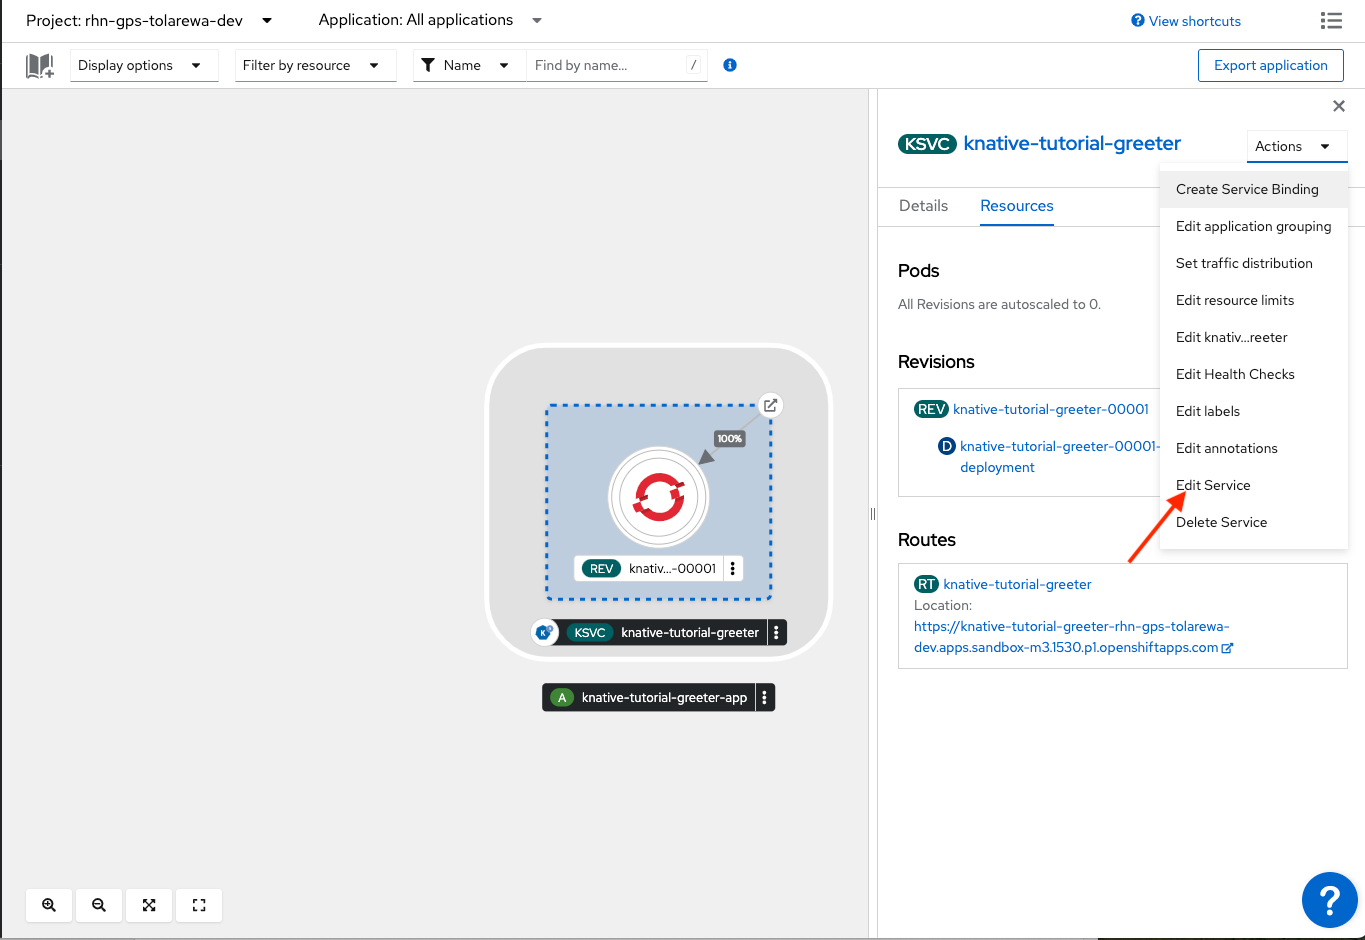
Knative services expose our applications and provide auto scaling capabilities. In the top right, click the “Actions” dropdown and select “Edit Service”.
In the yaml file, find the tag autoscaling.knative.dev/target and change it to:
autoscaling.knative.dev/target: '1'
Click “Save”.
autoscaling.knative.dev/target specifies the target concurrent requests for each pod. After this limit target is reached, OpenShift will add a new pod.
Note: These are soft limits, so we may not see a one for one.
Next, we’ll run some traffic to our application. On the left sidebar, click “Topology” and select our application.
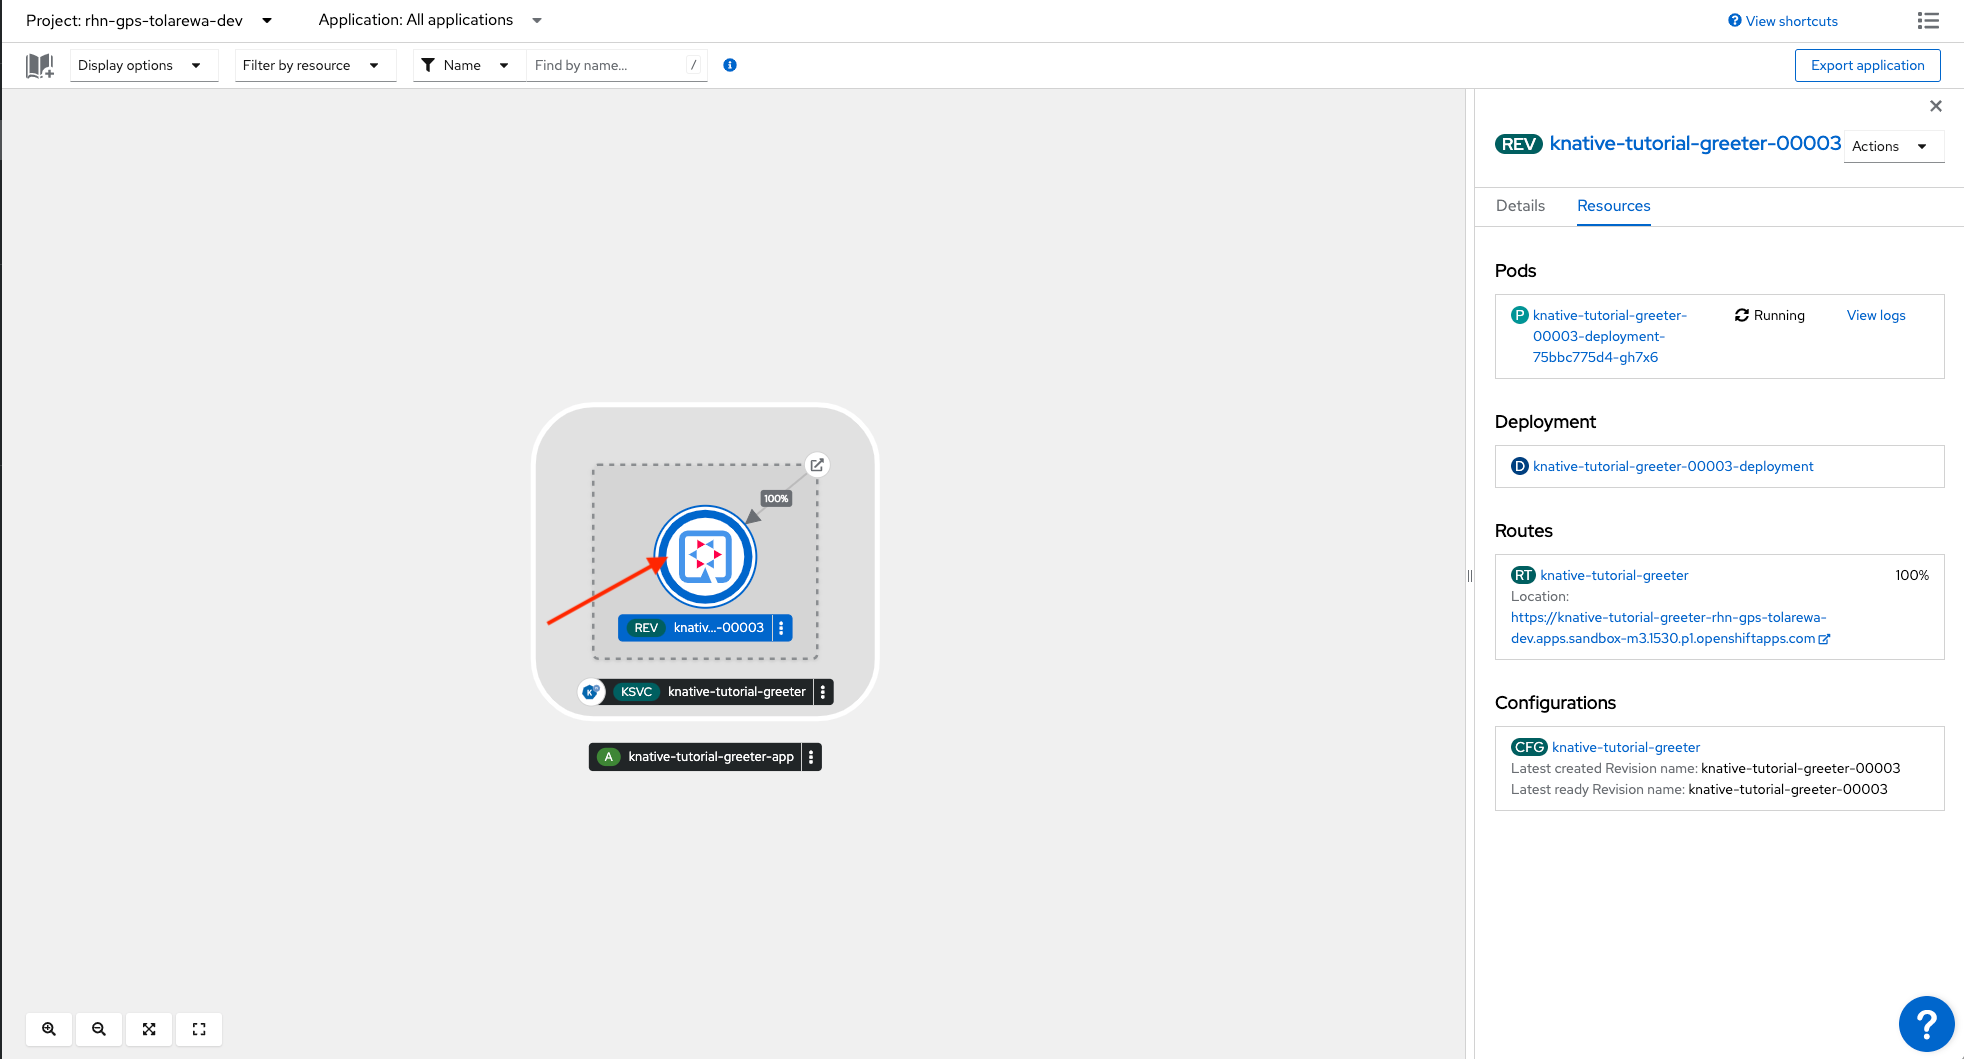
In the right sidebar, you should see a url under “Routes”. This is the url of our application. Open a terminal and paste this command:
hey -c 20 -z 20s [YOUR_URL]
This will send 20 requests to our application over 10 seconds. In the Topology View, you should see more pods spinning up.
When the traffic is done, you should see the pods terminate and scale back down to zero.
Step 3: Scaling an Application Based on CPU
Instead of scaling our application based on requests, we can also scale based on pod CPU usage. In the Topology view, open up our Knative service to edit it.
Change the annotation section to look like this:
autoscaling.knative.dev/class: hpa.autoscaling.knative.dev
autoscaling.knative.dev/metric: cpu
autoscaling.knative.dev/target: '50'
autoscaling.knative.dev/targetUtilizationPercentage: '70'
autoscaling.knative.dev/window: 60s
This configures our service to scale when the CPU usage has reached 50%. When this happens, the Horizontal Pod Autoscaler will add a new pod.
Note: The HPA has no scale to zero so there will always be one pod running
Let’s run some traffic on our application again. Open a terminal and enter this command:
hey -q 20 -z 120s [YOUR_URL]
Navigate to the topology view and click on one of the pods. After a while, you should see pods created as the CPU usage goes up.
Nice work! You’ve just created a serverless application that can scale based on concurrent requests or CPU usage.
A Note About Vendor Lock-In
There are a few notable Serverless offerings from cloud providers:
- AWS Lambda
- Google Cloud Functions
- Azure Functions
Unfortunately, code written for of those providers means that it’s not portable on the other. That's where Knative comes in. Both Knative and OpenShift run on-prem and all major cloud providers.
Hybrid Cloud Serverless
Companies can save money by combining both on-premise and cloud serverless deployments.
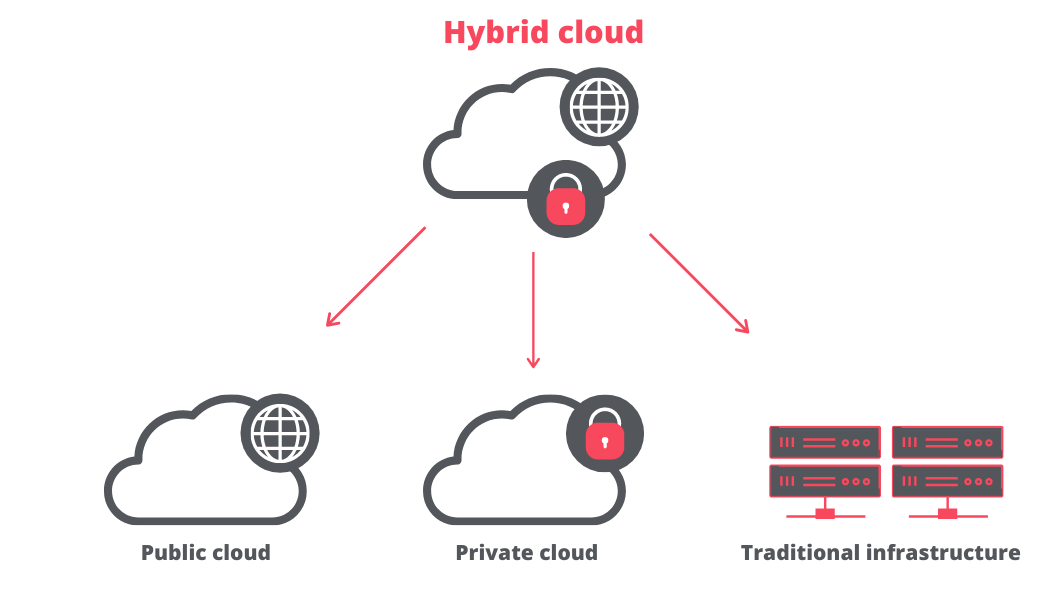
Serverless deployments can run in private data centers and burst to the cloud only if more power is required. Ultimately, this means that companies need to purchase less hardware. I’ll do a post on hybrid cloud serverless soon :)
Best Practices
When creating applications to run in a serverless model, choose a framework with a fast startup time (like Quarkus!). Since Serverless applications are constantly spinning up and down, long startup times will increase your latency and costs.
Recap
Serverless helps us do more with less. It's an on-demand computing model that helps us only pay for what we need. OpenShift Serverless, based on the Knative project makes it easy to deploy serverless applications anywhere.
Project Code & Links
Happy Coding,
-T.O.